How do you back up your WordPress website? You might use a plugin but these can and do fail which is why it’s useful to have the skills to do it manually. Better a little caution than a great regret!
Don’t get me wrong; my favourite backup plugin works 99% of the time, but that 1% of the time it doesn’t work bothers me.
In this post I’ll share my own methods for backing up your WordPress website manually, without plugins.
Warning: WordPress Back Up Plugins Can Fail
There seems to be a lot of WP newbies gravitating toward plugins because they don’t know how else to make backups.

Every time WordPress is updated I wonder what plugins are going to break.
I also feel concern for clients who don’t know any way to backup besides a plugin. It’s a good idea to educate your clients to help them feel confident about creating database .SQL file backups.
No plugin is going to work 100% of the time so it’s a good idea to have backup plans for your backup plugins!
Whatever happens, if you’ve been creating good, solid, reliable database backups, you can recover everything based on the last known good configuration of your site.
Causes of WordPress Website Breakage/Failure/Death
How a WordPress website succumbs to an untimely death depends on many factors. It can be attributed to any of the following examples:
- You edit a PHP file and break your website
- You install a bad, untrusted, insecure or badly coded plugin
- Your hosting resources max out and the site goes offline
- Your webhosting server undergoes a DoS attack
- You fail to keep the WordPress core updated and miss security patches
- Human hackers with an axe to grind target your WordPress site
- Malicious automatic software/bots decide to have a go at your site
Why You Should Backup Manually
When I started experiencing instability problems with the Duplicator plugin I realised it was madness to build a great business website that relies on a free plugin to create the backup.
We live in a world where hacking has become the norm. You cannot afford to take half measures.
- Duplicator has been fine for the last few months but what if they have another hiccup?
- What if a client needs their database restoring and the plugin will not work?
You cannot rely on unstable jerry-rigged systems that hinge on free plugins. Even the premium plugin BackUpBuddy by iThemes has had its off days.
The Two Parts of WordPress Back Up
There are two stages to backing up a WordPress installation:
1) Your Website Directory
Manually backing up the actual files is relatively simple. Use a free FTP client to copy all your folders in the website public directory to your computer.
You may not need to backup the directory if you’ve only inserted text on your site, since text is stored in the MySQL database. If you add images however, you’ll need to backup the directory in which the images are stored.
2) Your MySQL Database
Manually backing up the MySQL database is a little harder because it involves logging into your web host and accessing phpMyAdmin.
Not everyone uses phpMyAdmin BUT most budget shared hosts do. The following instructions will probably apply to you if you’re using something like GoDaddy or Dreamhost shared Linux hosting.
phpMyAdmin Database Manual BackUp/Export
There are lots of ways to backup and restore a MySQL database. Some developers will disagree with my methods but I’m trying to remember small business owners/managers with limited time, resources and knowledge could be reading this.
Watch the video below to see how I backup the database by downloading the .SQL file from phpMyAdmin.
1) Access phpMyAdmin
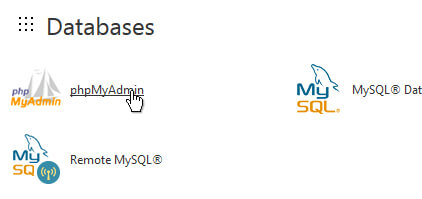
First of all, access phpMyAdmin either by going through cPanel or through whatever kind of dashboard you’re using.
If it’s Linux cPanel – which is pretty common – you’re looking for the icon below:
2) Select Correct Database
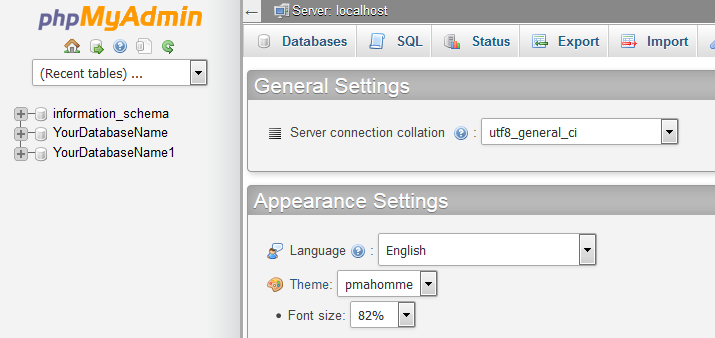
Once you’re inside phpMyAdmin you need to select the name of your database from the left hand panel.
You’ll probably only have one database, but you might see multiple databases, especially if you’re running multiple websites.
Find out which database corresponds to the website you’re backing up.
3) Export Database to .SQL File
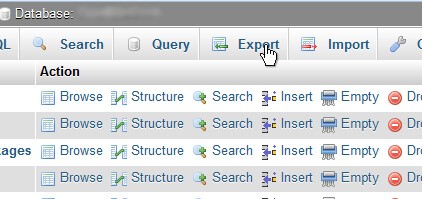
Having chosen your database by clicking on it, click the Export button along the top row as shown below.
This will take you to the area where you may download your database.
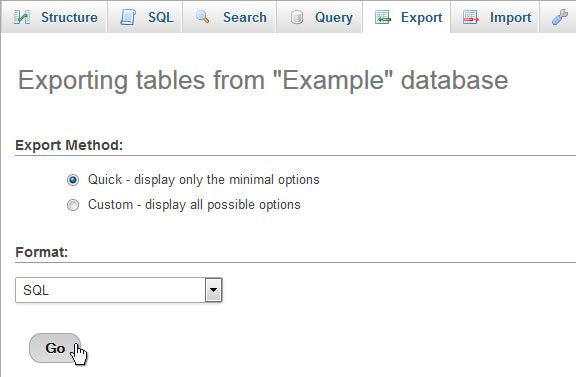
In the screenshot below the Export Method is set to Quick. Clicking Go will download your .SQL file with all your database information contained therein.
If your website is compromised, you can restore the same SQL file by choosing Import.
The configuration of the site, plugins, content, comments etc will be recreated as they were at the time you created the .SQL backup.
Copying the actual files in the website directory is a separate step and is best done using something like FileZilla.
4) Customise SQL Export Options
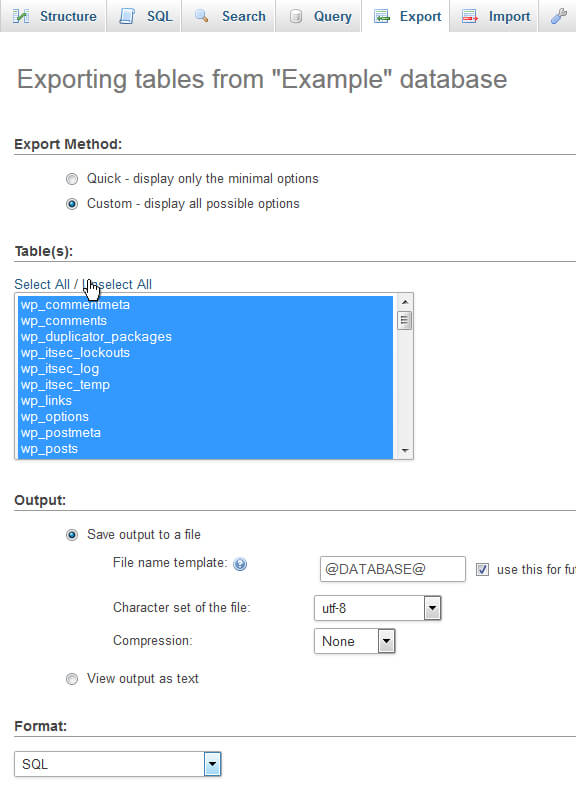
The other phpMyAdmin export option – Custom – gives a little more wiggle room as far as Export options go. If you’re a total beginner you can probably stick to the Quick export options for now.
Anyway, clicking Custom expands your choices, such as giving the ability to export individual tables.
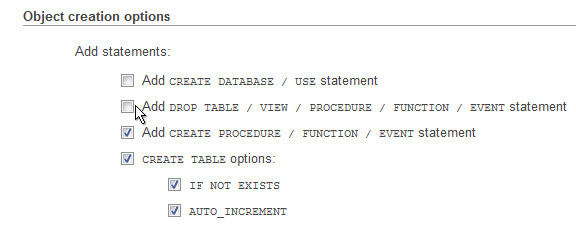
You can also set the .SQL file to contain a command which would automatically drop the tables of any database it is imported into.
This means you would not need to manually drop the tables of a database before importing the SQL file.
To set the command to drop tables automatically, check the following box:
Add DROP TABLE / VIEW / PROCEDURE / FUNCTION / EVENT statement
The screenshot below shows my cursor hovering over the box you want to check:
phpMyAdmin Database Import
If your WordPress website becomes corrupted, you’ll want to restore the last known good configuration. You’ll be using the .SQL file you saved to your computer the last time you exported the database.
To import your database, log into phpMyAdmin and select the database you want to import to.
1) Drop Tables Before Importing
Remember, when you import the .SQL file back into phpMyAdmin you must drop all the tables of the database you want to import the SQL file into, UNLESS you set the drop tables command as mentioned in the previous section.
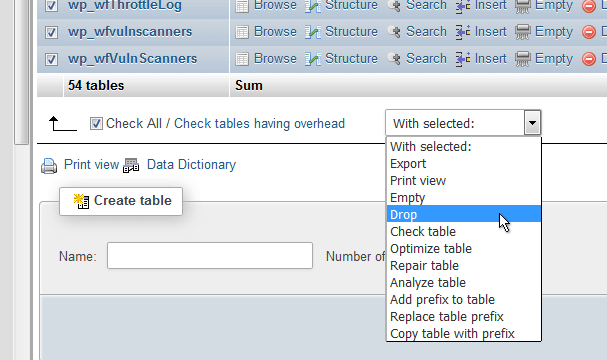
To drop tables manually, check all the tables and then select Drop from the menu.
If you do not drop the tables before importing, you’ll end up adding extra tables to the database. This will screw everything up.
Some people just empty their tables by choosing Empty. The tables and rows will remain, kind of like a beehive minus the honey!
I prefer to wipe everything by dropping the tables, because when you import your SQL file all the rows and tables will be rebuilt inside your database.
2) Import SQL File
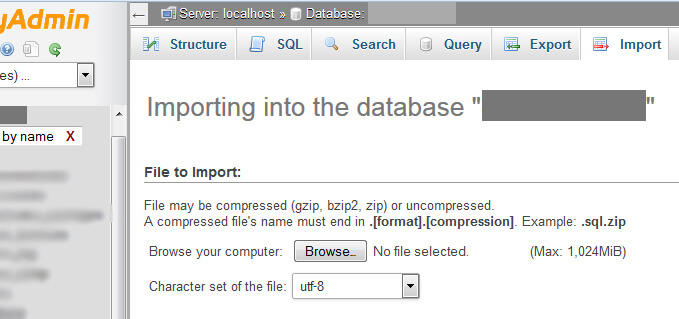
Choose Import and browse to the SQL file you saved on your computer. Choose it and click OK.
Depending on the size of the file, it could take up to a minute to import. It might look like nothing is happening at first.
Don’t be tempted to click or interfere because the process will in all likelihood be executing even if it looks like it isn’t.
A Word on phpMyAdmin Upload Limits
An issue you’ll possibly encounter on shared hosting is a capped resource limit on PHP uploads. This is problematic because as your site grows larger over time, your .SQL or .ZIP database files will exceed the upload limit allowed for your database.
At the moment, my database runs on phpMyAdmin and I know GoDaddy sets a pretty high upload limit to begin with so that’s not a problem.
They set it at 1, 024MiB which is roughly equal to 1GB. For most .SQL files this is plenty but you might want to try and change this.
1) Identify Any Other php.ini File
First create and run a script called phpinfo.php in the root of your web server. This file is then accessed through your browser and the screen will output your PHP configuration and reveal – among other things – what the upload limit is.
You can create this script either by opening up a Dreamweaver document or using Notepad++.
Copy and paste the code below to your document and save it as phpinfo.php. (The name of the file doesn’t actually matter – it’s what’s inside that’s important)
If you’re using notepad remember choose All Files for the Save as type option.
Next, copy the file to the root of your web server using whatever FTP client you prefer. I like FileZilla.
Once it’s copied, visit the location of the file by typing the full path into a new browser tab.
It will be something like http://www.yoursite.com/phpinfo.php. This leads to the next part…
2) Adjust PHP Configuration Settings
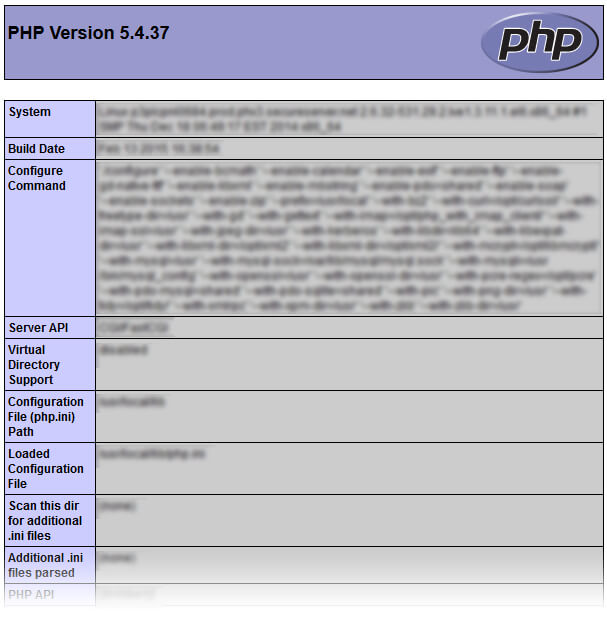
Now you’ll be presented with the PHP configuration. It’s a long page but we’re only mainly interested in the following:
post_max_size =
upload_max_filesize =
I usually use CTRL & F to quickly search for and identify the above lines of code inside phpinfo.php.
I don’t know what the file size values will be set at for your particular host, but usually post_max_size is either the same as or larger than upload_max_filesize.
To increase the PHP upload limit, you normally create a file called php.ini containing some commands to set a higher file size.
Go back to your phpinfo.php and look for the following about seven rows down:
We’re being told we need to create a file called php.ini to override the default file upload size.
3) Set Global PHP Upload Limit
If you want to increase your PHP upload size you can set a new value globally in php.ini which is copied to the server root.
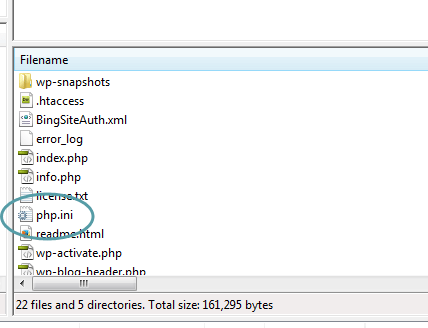
Create a php.ini file and add the following inside it:
post_max_size = 80M
upload_max_filesize = 80M
If you know the size of your .SQL file, set a size limit larger than the file size.
Save your file as php.ini and copy this to your web host’s server root.
Theoretically your upload limits have now been over ridden.You SHOULD be able to upload an .SQL file up to 50MB in size through phpMyAdmin.
GoDaddy have published guidance about default upload limits on shared hosting so you could check that out.
By the way, if you’re using a managed WordPress hosting package, you’ll need to change the filename of php.ini to user.ini. With the latter you must wait 5 minutes for everything to update.
Finally, to see changes in phpMyAdmin, you might need to restart your Apache server and kill all processes.
4) Restart Your Web Server
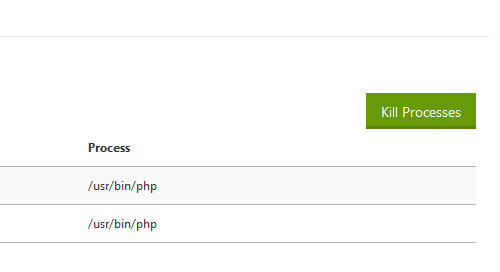
In case you’re not seeing your MySQL important size changes take effect (https://support.godaddy.com/help/article/5647/why-isnt-my-php-initialization-file-taking-effect) it might be necessary to forcibly refresh the PHP initialisation file by “killing” PHP processes in your webhost.
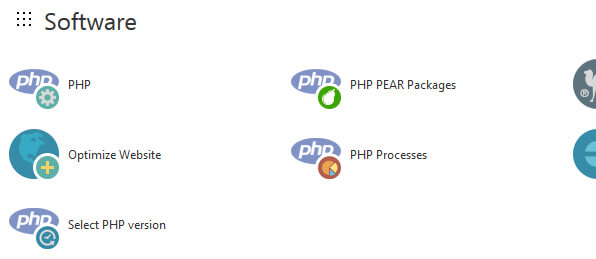
Assuming you’ve got Linux cPanel shared hosting account one way to kill the PHP processes is to login to cPanel and scroll to the section entitled “Software.”
In this section is “PHP Processes”. Click it.
In principle, the procedure is the same for Shared Linux cPanel hosts, but I happen to know Dreamhost doesn’t use cPanel and they don’t use php.ini. DreamHost use something called phprc.
cPanel Database Manual BackUp
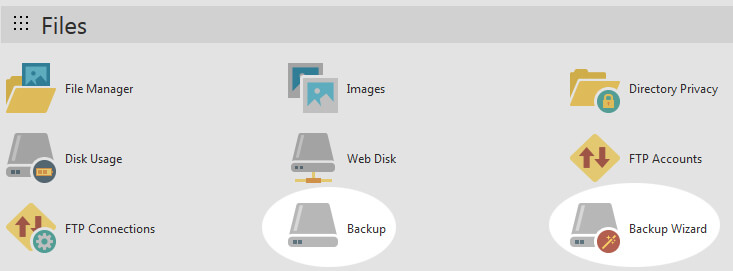
If you use cPanel, you can backup your databases at the hosting level if phpMyAdmin is not doing it for you.
Under Files you may choose Backup or Backup Wizard. Personally, I do not use these but you might want to:
From inside here you may take a full site backup or just the MySQL backups.
WordPress Upgraded Charset in April 2015 & Bad Stuff Happened
Before we finish up, please stay a little longer and read what I have to say about backup hiccups. I call this a “baccup”.
In April 2015, WordPress released version 4.2 by adding support for Emojis.
These are 4 byte cartoon-like emoticons that could actually be added to page titles. Because these things found their way into the unicode character set, WordPress had to upgrade their tables from utf8 to utf8mb4.
The following month, it turned out this “upgrade” was in fact a red herring to provide a pretext for Automattic (makers of WordPress) to deal with a serious security issue threatening every installation of WordPress.org on the web.
Andrew Nacin, lead developer of WordPress, gave a talk at Loopconf, where he covered a series of WordPress security fixes spanning two years, with the final fix being a major update to the WordPress core under the guise of emoji support.
So what has this got to do with baccups? Let me tell you…
MySQL Version Compatibility Issues!
The support for 4 byte unicode characters has created an altogether separate issue in most (if not all) MySQL WordPress databases. While some webhosts support utf8mb4, many do not.
This is causing workflow problems for those that backup regularly or wish to move their website to a testing server, or indeed migrate to another host.
Meanwhile, WordPress have claimed that the new character set is 100% backwards compatible while the MySQL 5.5 upgrade notes said a 4 byte character cannot be fed into a utf8 column.
The compatibility challenge that has arisen seems to hinge on older versions of MySQL not supporting the new character set.
Or you could look at it the other way around and say the problem stems from webhosts using newer versions of MySQL that DO support utf8mb while your current host may not support utf8mb4.
SSH Backup
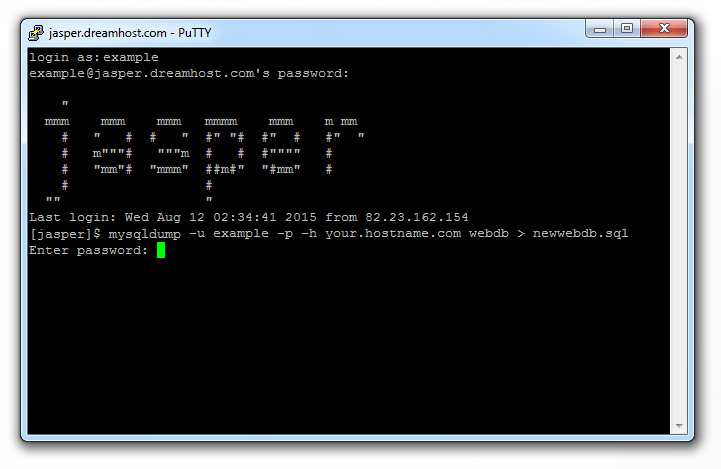
I am now using SSH as an alternative way to create database backups in addition to the phpMyAdmin backups.
SSH means “secure shell” and is a way of connecting to a remote server through a series of text based command lines. It’s the kind of interface you often see stereotype hackers using on television or in films.
A MySQL database backup created using “the shell” is known as a mysqldump [sic] and will be compatible with any version of MySQL as long as it was generated using the latest version.
By comparison, phpMyAdmin seems to add extra data to the SQL file, resulting in a larger file than mysqldump. In all the tests I have run in the last few weeks, mysqldump has been the most reliable method of generating my database without causing import errors.
An SSH terminal can be downloaded for Windows free. The software widely used is called PuTTY and is for accessing remote servers.
If you’ve never backed up a MySQL database this way before I do recommend you at least try, perhaps with a testing server and testing WordPress website.
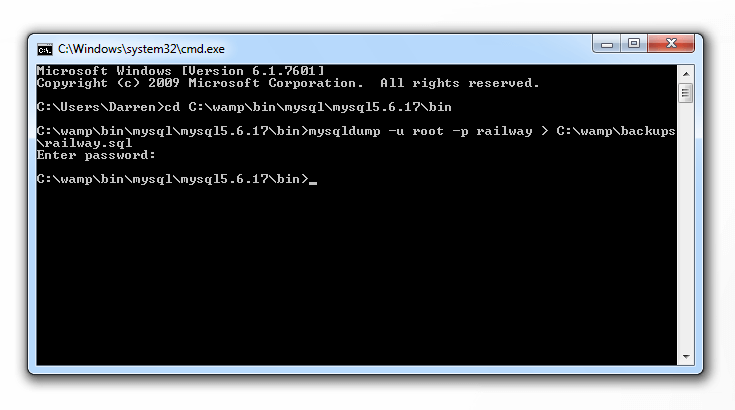
Also, if you work locally and want to take a backup for moving to a live site, it is possible to use the built in Windows Command Prompt interface. This is the local equivalent of PuTTY.
WAMP comes with a MySQL stack built in that you can create a mysqldump locally together with Windows Command Prompts.
The screenshot below shows the Windows directory I created my database backup from. The directory is the default path that MySQL is installed to when you install WAMP. Using the command prompt I specified a new directory for the output database at C:\wamp\backups\railway.sql.
WordPress is Vulnerable – Take Action Now
While I love WordPress, it is a dynamic content management system, built on PHP and not without its vulnerabilities.
It is not an unsinkable ship. There is plenty of nasty cyberspace debris floating around the internet waiting to cause some hull breach.
This very subject has also prompted me to write about a common mistake that can lead to brute force automatic hacking attempts on WordPress by malicious software.
Analysis
At some point, novices WordPress users get wind of the fact they probably ought to backup regularly. Others are not so diligent and allow this important step to fall by the wayside.
If you’ve never experienced the consequences of a WordPress meltdown, it is certainly very exciting… in the worst possible way.
I take it you want to avoid a situation where you’re up all night, holding back the tears of despair as you realise your business is well and truly offline because of website issues?
You know what to do…




hey Darren, maybe you are interested to our free export plugin too?
https://wordpress.org/plugins/export-database-littlebizzy/
thanks for considering!
Thanks, but why would I need this when WP Migrate DB has the same functionality. If I want to export a database live as-is, WP Migrate DB does that.