Vegas is a powerful multitrack audio/video editor with just about everything you need to create and edit content either for YouTube videos or even podcasts. Love it!
I use Vegas in combination with other software including Adobe Audacity and Screencast-O-Matic to produce educational YouTube video screencasts and short trailers.
Originally, this application was developed by a brand called Sonic Foundry but was later bought out by Sony Creative Software. I fondly remember Sonic Foundry way back circa 2001 when I used an audio/music sequencer called Acid and an audio editor called Sound Forge. These were all taken over by Sony and in my opinion became even better.
At the moment, I am running Vegas version 14 on Windows 10. I use subtitles on certain videos where I know it might be difficult to understand what I’m saying, or if social media timelines automatically mute the video in the feed, which means people just see the visual but don’t hear anything.

The software also supports VST plugins which I love. I use an EQ spectrum analyser called SPAN, which allows me to see any problematic audio frequencies, which are promptly rolled off or boosted with a native Vegas EQ plugin.
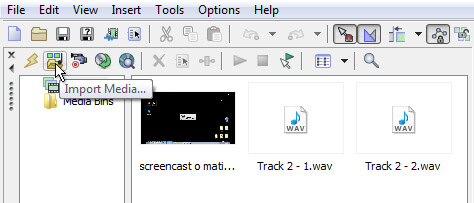
Import Media Easily
Importing media is straightforward. You simply import your video clip and drag it to the timeline. The audio is automatically added as part of the video, meaning you get a video track and audio track instantly. If the footage came from an iPhone, convert it to MP4 using the free Handbrake software.
File Types You Can Open
Lots of file types are supported, but the one I work with the most is MP4 since this is what my ScreenPal videos render as.
If it’s purely audio I’m working with, I import MP3 and WAV files.
You can also import image files including JPEG files or transparent PNG files.
Photoshop PSD files with layers are supported too, which have its uses, not that I do much with these capabilities.
File Types You Can Render To
When I set up my MP4 rendering options, I make sure the sound is saved as a 160kbps MP3. There is no need to save in an audio quality higher than this since YouTube will be compressing your raw file anyway.
Are you creating music or podcasts? Do you create jingles or audio idents?
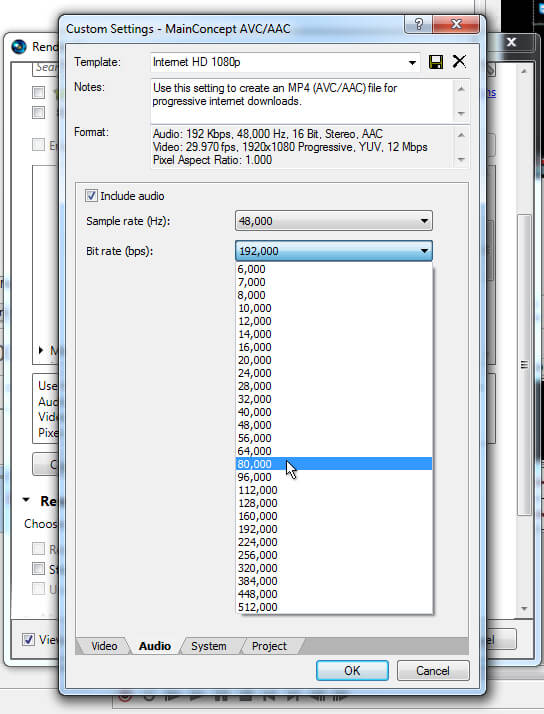
Again, an MP3 at 160kbps is fine for most media devices but if you want to push up the quality for whatever reason, 192kbps can make your sound quality sparkle a little. If you’re creating a DVD or CD, consider 320kbps if your media is going to be played back on a high spec system.
Easy Video Editing
One of thing I always liked about Vegas is the straightforward editing of video. The barrier of entry is low and most newbies can pick up how to use the software.
Within a few hours of playing around you’ll be able to edit and produce an original video. The automatic crossfade envelopes are nice, and a reason I prefer audio editing in Vegas rather than Audacity (which does have a role to play, just not in detailed editing).
The learning curve is not very steep at all, but in all honesty, it might be easy for me to say that because I’ve used Sony Acid in the past.
There are lots of advanced features in Vegas I still haven’t gotten around to using yet. I recently started working with green screen, which is opens up many possibilities.
Great for Podcasters
If you want to, you can use Vegas for audio and nothing else. A podcaster or jingle maker will appreciate the powerful audio capabilities on offer so don’t overlook this software if you’re not all that interested in the video side of things.
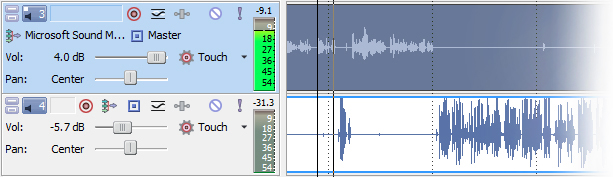
Myself and a friend used Skype with a plugin called Evaer to record a stereo conversation to MP3. This was imported to Vegas and edited.
The screenshot below demonstrates how you can import such a file (as long as it is recorded in stereo) and edit it. I was able to play with the volume sliders to normalise the levels of the conversation.
Grouping and UnGrouping
If you move a video clip on the timeline, both video and sound stick together. Of course, you can disconnect the two if you want to do some fancy cutaways or realign the sound to a different part of the video.
If you want to disconnect the video from the audio so the two parts can be moved independently, you’ll need to use the Grouping functionality controlled by keyboard shortcuts, or by right clicking your clip and selecting the options under Group.
To Ungroup video and audio, select the clip, right click and select Remove From.

Alternatively, pressing the U key on your keyboard achieves the same thing.
Similarly you can Group video and sound back together by highlighting the two parts and pressing the G key.
Vertically Splitting Clips
Splitting clips vertically on the timeline is a simple matter of clicking your cursor at a specific point and pressing the S key. This splits/slices your clip.

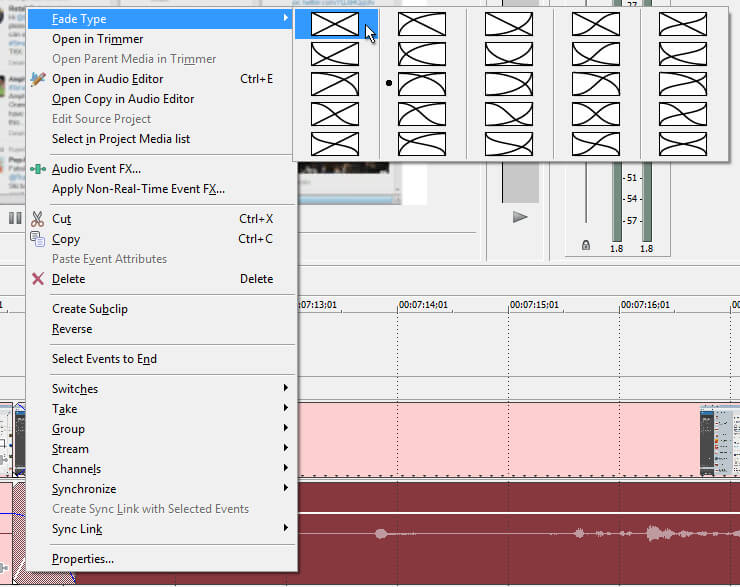
Easy Crossfading
As mentioned earlier, I’ve always appreciated the use of volume and video envelopes on clips from the old Sonic Foundry’s ACID music software, which continues in similar fashion under Sony Vegas.
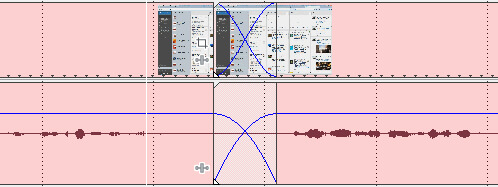
You can change the shape of these envelopes, so that there is a slow fade or a quick fade, or so that the fade follows a preset style of fade.
Rendering Tips
When it comes to rendering, you’ll need to create a new file name. Please make sure you do not accidentally save over the original source file that you imported in your Media Library.
Vegas has a habit of wanting to save OVER the source video/audio you used to produce your project. This can obviously lead to problems. It’s like a snake eating its own tail! Choose a unique file name to save to and be careful not to make this mistake.
Next, choose the file format and rendering template. If producing a video I go for the MainConcept AVC/AAC (*.mp4) preset and choose a resolution appropriate for YouTube.
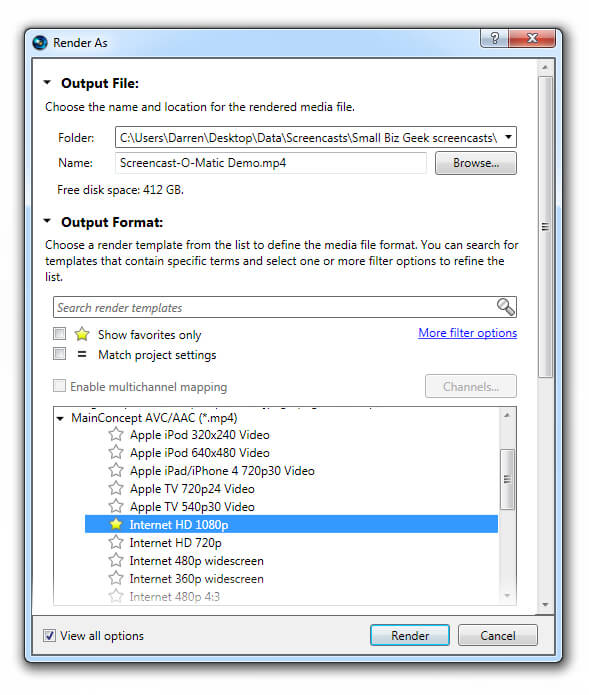
You can furthur customise the preset, so in this example, I selected the Internet HD 1080p and then clicked Customize Template.
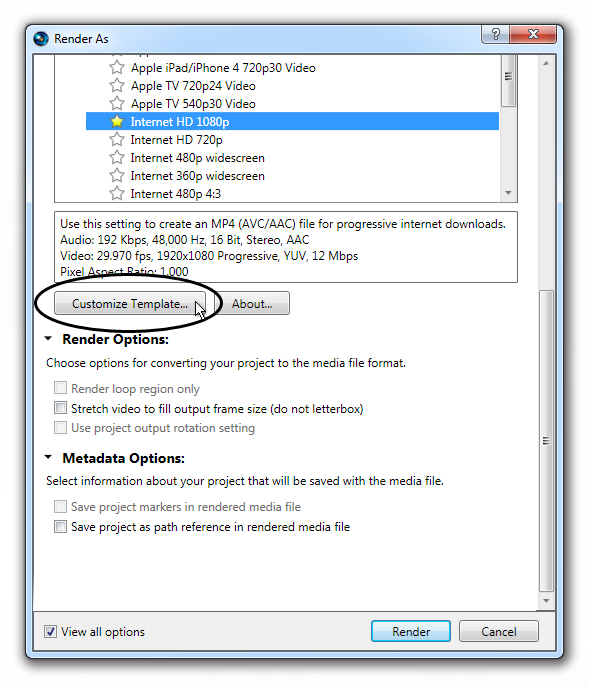
A new window opens where I can adjust the settings to maintain quality but lower the file size.
In most cases, if you’re working with screencast footage or camera phone footage, the quality will already be pretty low, so there is no need to render your project to a file where the export settings are much higher than the source footage you imported.
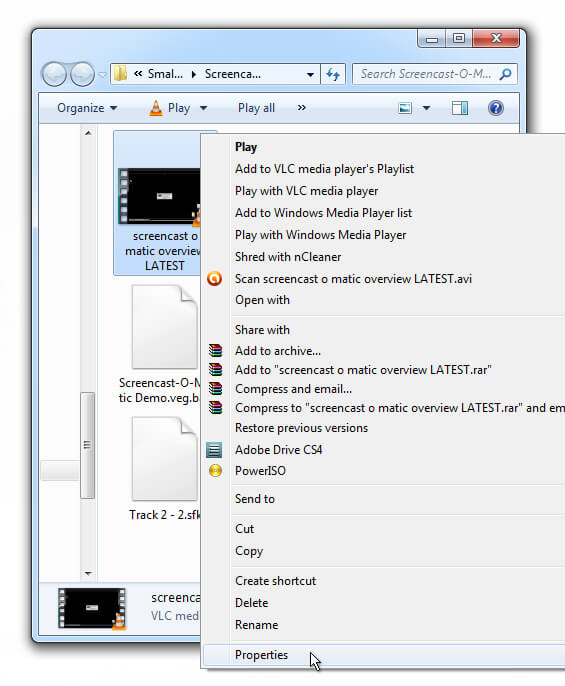
For this reason, I often look at the properties of the source footage to determine the quality of what I’ve been working with in the project. You can right click the project media and go to Explore Containing Folder.

This will automatically open the destination folder of the media you’re working with in the project. From here you can right click the file you have been working and go to Properties.
You can see an example of this below:
Once you click Properties, you can examine the details of the file and see what the quality of the video and audio is.
Look at the screenshot below and you’ll see what I mean:
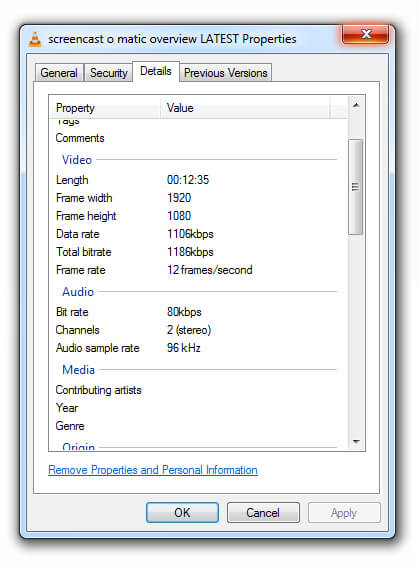
Actually, if you look closely at these details, you can see the audio was recorded at 80kbps.
So for this particular video project in Sony Vegas, I can set the audio rendering settings much lower, otherwise I’m just pumping up the final rendered file size for no good reason.
If you’re rendering a video for YouTube or similar video website, you can definitely lower the settings to save file size, not to mention the time it takes to render the video.
In the screenshot below, I’ve highlighted the key things you want to pay attention to. These are Frame Rate, Maximum/Variable Bitrate and Encode Mode.
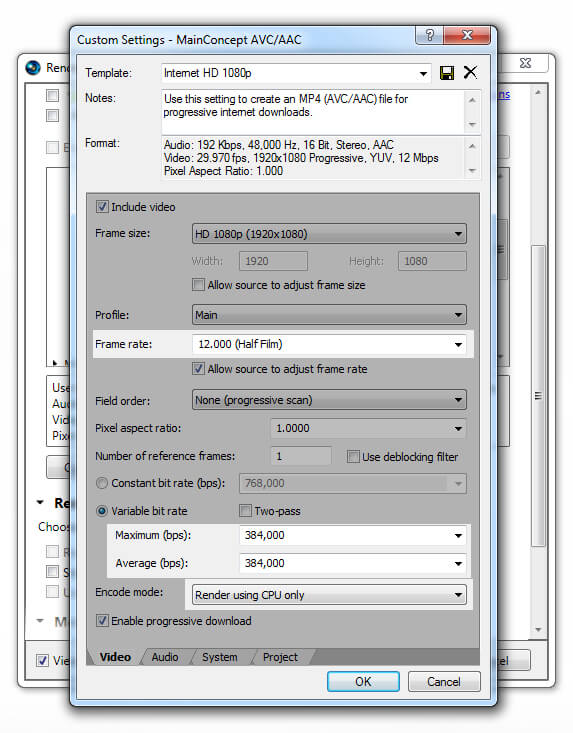
As you can see in the image above, I chose a Frame Rate of 12:000 and a Maximum/Variable Bitrate of 384,000. YouTube will automatically compress your file so there is no point rendering with settings that are too high.
I always set the Encode mode to use CPU, because my PC graphics card is integrated with the CPU. If you have spent a lot of money installing a PCI graphics card on your desktop machine, choose the GPU option.
The vast majority of laptops have integrated graphics cards, meaning you can just select Render using CPU only.
Summary: Relatively Simple Video Software that Ticks Enough Boxes
Vegas is GREAT tool for me and if you’re new to video editing this a great piece of software. If you’ve been using Windows Movie Maker and are looking for an affordable upgrade, this is recommended. There’s lots of tutorials online and it comes in handy for both audio and video editing.
Add Your Thoughts