After 12 months of research I finally settled on the ATR2100 budget USB/XLR microphone suitable for podcasting, presenting, field recording, and music.
For years I had known the importance of sound as part of my business operations since audio/video plays a large role today in marketing, especially with remote working becoming so important.
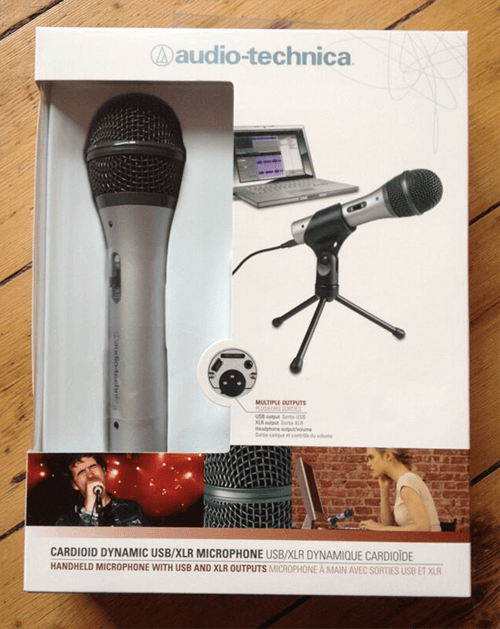
So, I settled on the Audio Technica ATR2100 USB XLR Mic (USA affiliate link), bagging it for a mere £51 brand new from a US Amazon seller. You can check to see if the Audio Technica ATR2100 USB XLR Mic (UK affiliate link) is available on the UK Amazon too.
From 2012 I’d been using a cheap USB mic headset for everything, which was OK, but made my ears hot and sore.
It’s a business marketing tool and therefore tax deductible!
I wanted something that could handle broadcast-quality sound as well as eliminating background noise, which is pretty important if you work from home or if it’s particularly noisy. It’s also suitable for say, taking along to a networking event and plugging into a laptop.
Recently I recorded something standing up and holding the mic rather than sitting down as I usually do. You can watch that below…

Audio Technica ATR2100 Mic: Sound Test
Why I Purchased the ATR2100
The general consensus seems to be that the Heil PR40 is considered a top-end podcasting mic… if you can afford it. It retails for about £300.
If you’re like me, you want something relatively inexpensive yet formidable.
After watching, reading and of course listening to microphone reviews, I made the purchase decision.
ATR2100 Specs… (And My Thoughts)
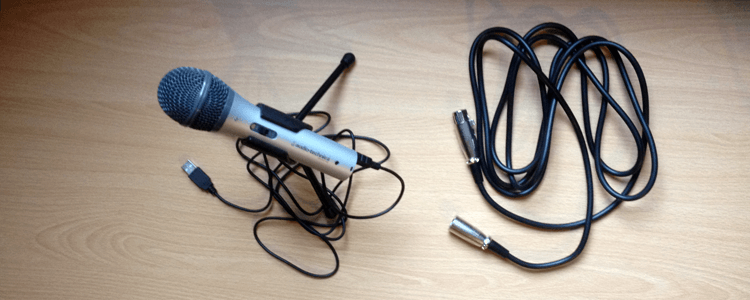
The diagram below has been scanned directly from the paper instruction booklet. The plastic stand and two leads are included.
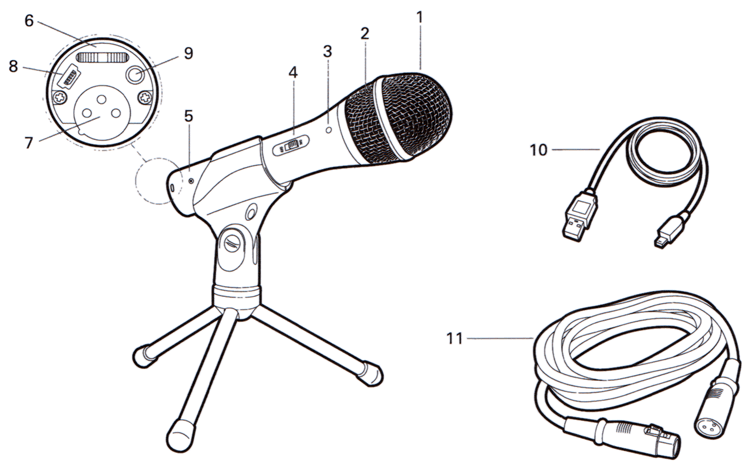
Let’s run through each of the following 11 items from the diagram. I’m copying the exact words from the booklet with my commentary appended:
1. Windscreen
“Multi-stage grille design offers excellent protection against plosives and sibilance without compromising high-end clarity.”
My comment: This microphone is designed to be spoken into directly on the top, and I’m afraid to say that plosives can be a problem.
You can always try a “side-address” positioning slightly off-axis, but keep in mind the further away you are from the mic, the quieter the recording.
If you want to hit the “sweet spot” of this mic for the best sound, you want to be about 3 inches away with the gain settings on your sound card turned up to around 90%.
Consider investing in either a foam ball or a mesh pop filter if you want to produce the best quality sound.
A foam ball is ideal if you’re outside of a studio environment, interviewing people, or possibly in windy conditions.
A mesh pop filter can be had for under £10 and is best attached to a sprung scissor arm boom stand. The best thing about the mesh pop filter is that you can position the mic about 3 inches behind it and then get as close as possible to the pop filter when you’re talking, ideally with your nose almost touching the mesh.
That would give a consistent, even sound.
2. Capsule
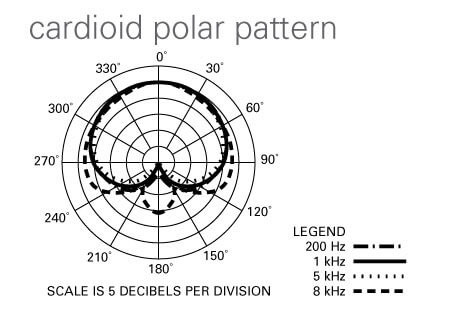
“Dynamic microphone element with cardioid polar pattern”
My comment: This mic is sensitive to sounds from one direction, roughly in a heart-shaped space on the front of the mic. The word “cardioid” actually means heart in Greek.
A cardioid polar pattern means you must maintain certain proximity to achieve good results. The advantage to the cardioid polar pattern is that sounds from the sides, rear or from a distance are minimised.
Unfortunately my squeaky office chair has been faintly picked up by the mic even though the offending sound is more than 2 feet away.
The closer a cardioid mic is to the sound source, the deeper the bass response. This is commonly known as the “bass tip-up” and is observed by radio announcers or even podcasters wishing to add depth to the voice.
The ATR2100 gives a deep, professional, full bass sound when one maintains a proximity of 3 inches. The further away you are from the mic while recording, the more you’ll need to boost the gain in post-production. I use compression ratios of about 4:1 using Audacity to even up the sound.
The further away you are, the “roomier” the sound is. Not ideal.
3. Blue LED
“Blue light shows mic is receiving USB power (Note: The blue LED is not affected by the on/off switch position)”
My comment: If you’re using this mic on a laptop with low battery, beware! Try to have the laptop plugged into a power source.
4. ON/OFF switch
Functions for both USB and analog operation
My comment: The on/off switch also functions as a mute button during recording!
Need to cough? Mute. Someone else talking at length in an online video conference? Mute.
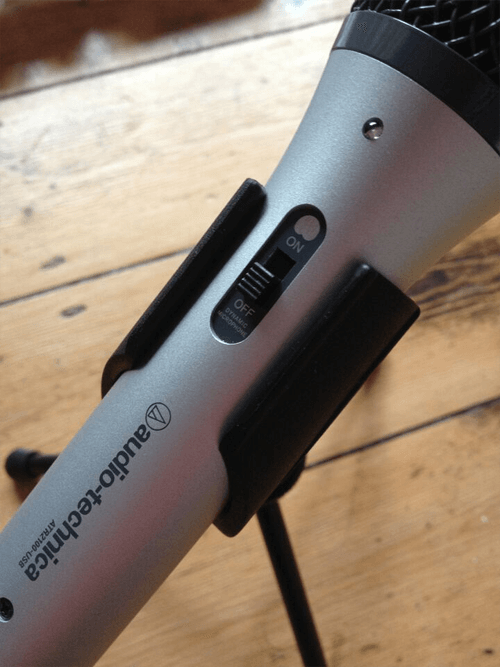
5. Metal construction
“Tough, durable, resilient design”
My comment: Dynamic mics are usually tough and water resistant. However I doubt the 2100 would stand up to something like the legendary SM57 or SM58 in a fight!
The Shure SM series mics are held in the same high regard as Land Rovers and AK47s.
When I took it out of the box the first impression was that although it felt well made, I would still want to treat it with care. It weighs just under 10 ounces.
6. Headphone level control
“Up/Down dial controls headphone volume”
My comment: It’s useful being able to monitor the sound going into the mic, but it is weird hearing your own voice and difficult to make technical judgements because of the bias.
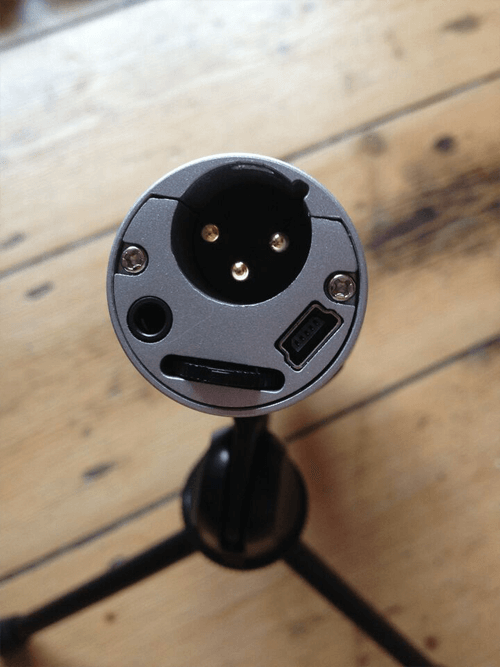
7. XLR connector
“XLR connector with analog output for connection to PA system’s conventional microphone output”
My comment: For superior results, it is best to record via XLR to a mixer, routed to a hardware device like a digital audio tape (DAT). Get a 24-bit mixer if you can.
So far, I’ve just recorded directly via USB but knowing I can rig this up to hardware is good.
8. USB
“USB connector for connection to your Mac or PC”
My comment: This mic only records in 16-bit USB which is noticeably worse than XLR. Most people begin using USB because they cannot afford a mixer.
While USB is convenient, you must remember that digital recordings are at the mercy of glitches and artifacts in the recording. A long recording puts your RAM capabilities at risk because of the memory buffer limitations. Latency may also be an issue.
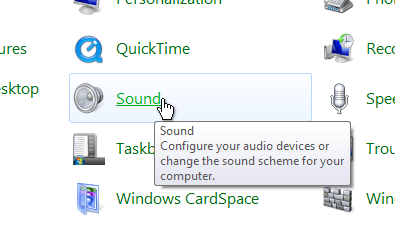
When you first plug the mic into a USB port, your Windows OS will automatically detect the device and install the driver.
Before you begin recording, go to Control Panel > Sound > Recording > ATR2100 USB Mic and increase the gain to around 90 or 100.
If you ever upgrade to an XLR setup, at least this mic will be usable because of it’s dual compatibility with digital and analogue.
9. Headphone Jack
“1\8 inch (3.5mm) stereo jack for connecting your headphones”
My comment: You can plug any headphones in to monitor what the mic is picking up.
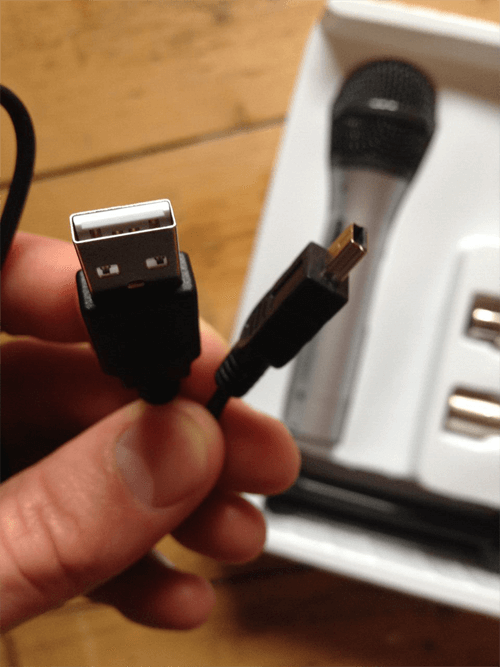
10. USB cable
My comment: The supplied USB lead is 210mm, well over 6 feet. This is fine for some people but I needed a longer cable for the scissor arm boom mic stand I purchased.
At present, I record directly into Audacity, or if I’m making a screencast, directly into ScreenPal.
By the way, the USB input on the mic is of the mini variety.
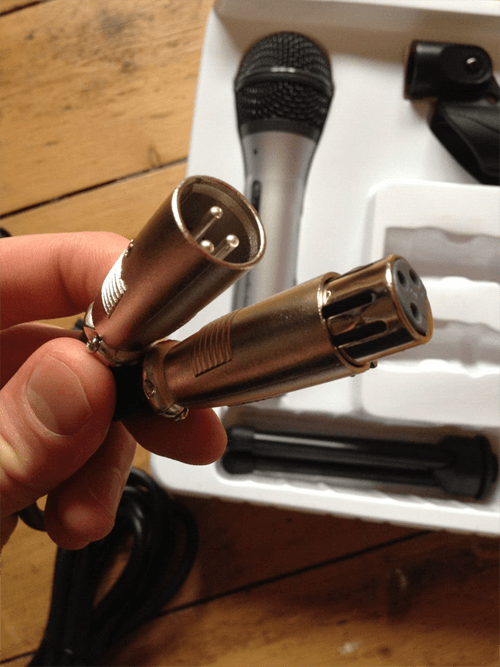
11. XLRM to XLRF cable
My comment: I’m glad the mic is supplied with an XLR cable. A direct to PC recording (via USB) is less stable and slightly poorer quality than analogue recording, so if I ever decide to get much more serious, my mic will be a good candidate for the appropriate set-up.
This would involve a mixer and digital audio recorder, which you can get second-hand online.
The “M” stands for male and the “F” for female, by the way.
Shock Mount: Protect Against Knocks & Vibrations
Something else I purchased for this particular mic is a shock mount (affiliate link). These devices prevent knocks, shocks and vibrations causing the microphone to pick up unwanted sounds during recording.
The shock mount I purchased is the OnStage My420 available on Amazon.
I purchased mine brand new from Japan at a very good price, although, if you’re in the EU, your country’s border force will levy a customs charges.

I researched various shock mounts before settling on this one because I wanted one that would fit my mic perfectly. I purchased a boom scissor arm stand and use the same mount on that.
Here’s a video overview of the shock mount:
iPad Compatibility
Although I’ve yet to try it, this ATR 2100 works with the iPad if you get an Apple camera connection kit. This is an adapter that ports the USB cable from the microphone to your iPad.
Summary: Excellent Budget Microphone That Has Lasted Years
The first-ever recording I made with this mic was for a YouTube video. At the time I had no pop filter over the mic and no shock mount. I simply had the mic about 1 foot away from me on its plastic tripod.
I also used ScreenPal, which, unfortunately, renders all audio at 64kbps in mono, meaning the sound quality gets taken down a few notches. Still, take a listen to the sound of the video and you’ll see it’s not bad at all for £50.
If you like this microphone, click here to buy it on Amazon. This is an affiliate link which means I will earn a small commission.
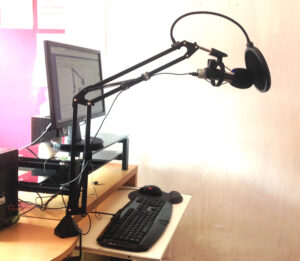
Finally, if you want a comfortable, ideal setup, you’ll want the mic very close to your mouth without you have to lean forward or strain. Trust me, this did my back no good for years, so I got myself a scissor-arm mic stand with a desk clamp. This has helped enormously and the mic fits perfectly.
Hello,
I was very interested to hear your thoughts about said microphone as right now I am considering buying a new one (I’m currently using an AT2020, but it’s a condenser…).
I am also considering the Snowball, but what I don’t understand is that despite being a condenser mic, it still gets plenty of praise for use which I wouldn’t normally consider ideal for that type of mic?
Regards,
Steve.
I once borrowed a friend’s Snowball, and if I remember rightly it picked up the entire room. I have the ATR2100 so that it doesn’t pick background noise.
Have you listened to any use cases of the Snowball on YouTube? There’s bound to plenty of sound-test videos demoing the mic in various circumstances.