Tunnel into your website’s remote linux server and grab whatever files you need using this free Linux terminal emulator for Windows.
Do you need to access a remote internet server through a secure tunnel? Perhaps you need to create a website database backup?
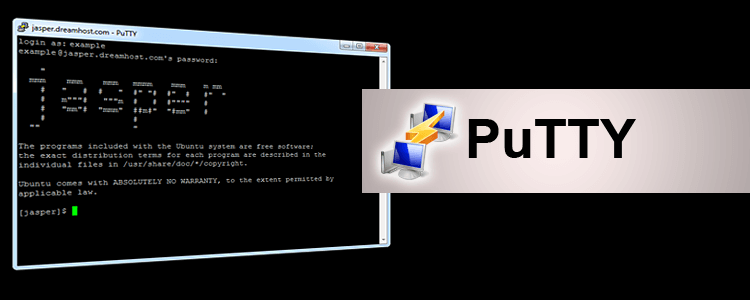
You might be interested in the highly regarded SSH client called PuTTY, a free terminal emulator for executing instructions in a command line interface.
Don’t get me wrong: plugins like the free WP Migrate DB are handy because it can grab your database from the remote server, but what if that fails? In my experience, these plugins sometimes inject extra info into the database which can mean it won’t import into a slightly different version of phpMyAdmin.
In these cases, you might have to take think about backing up WordPress manually without plugins in which I mentioned SSH among other things, and that brings us to PuTTY.
Since Windows has no default SSH (Secure Shell) capabilities for remote servers, you might want to keep PuTTY handy. It acts as a great alternative to WordPress plugins or phpMyAdmin for backing up a WordPress website database via mysqldump.
Installing PuTTY for Windows
Use the following steps to download and set up PuTTY onto your Windows computer.
1. Create Windows Directory
- Go to your
C:\(or whatever letter you use for local disk) - In that directory, create a folder named
\bin
This newly created folder is the location in which you’ll download your PuTTY files.
Note: It doesn’t actually matter where you download the files, but adding this directory makes it easier to keep track of the files.
2. Open the download page in your browser:
http://www.chiark.greenend.org.uk/~sgtatham/putty/download.html
3. Download these files to your C:\bin folder:
- putty.zip
- puttygen.exe
- pagent.exe
- pscp.exe
- psftp.exe
4. For easy access, create a shortcut on your Desktop:
- Right click on your Desktop and choose ‘New > Shortcut’
- Browse to the location of your putty.exe file (it should be
C:\Users\yourusername\bin\putty.exe) - Save the shortcut
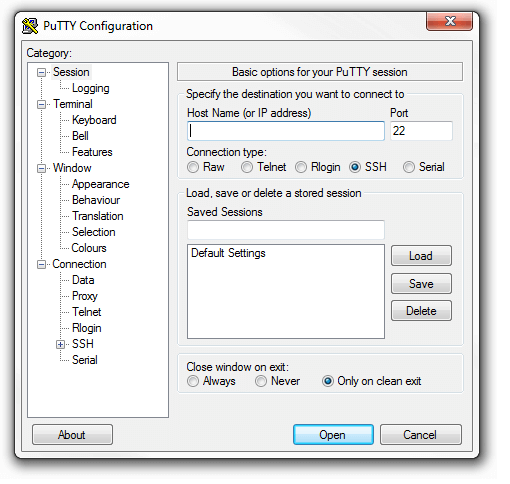
Connecting to Your Server
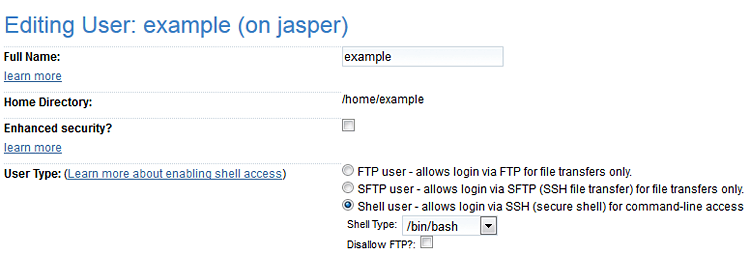
Before you connect to your server, you’ll need to log into your webhost control panel and make sure SSH is enabled for the user credentials you’ll be using.
Basically, you use your FTP username and password – the same details used when you access a remote server to copy website directories.
I have been backing up a website hosted by DreamHost, so I used the FTP credentials for that website.
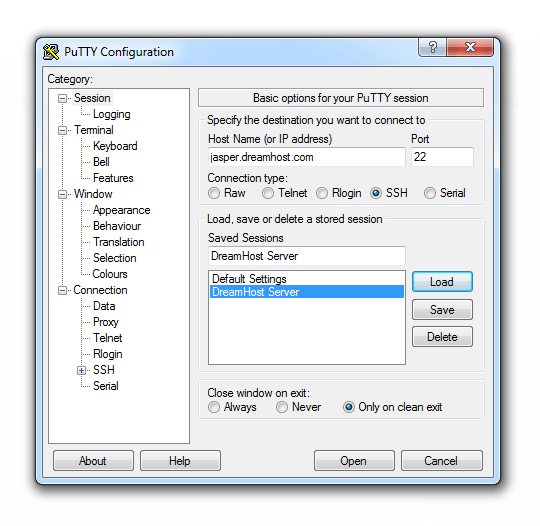
You also need to take note of the name of the server you’ll be connecting to because you’ll need that to enter in the Host Name box in PuTTY.
You may need to contact your webhost or refer to their knowledge base to find the Host Name and Port settings, such as this GoDaddy page about SSH.
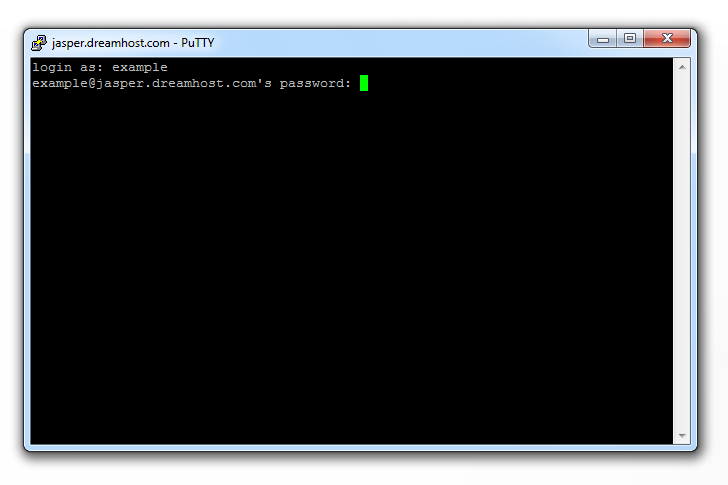
In my case, the server name is jasper.dreamhost.com as shown below:
Once the terminal window is open you should enter your FTP username and password.
Please note, when typing the password, it will not actually show up. It might look as if nothing is typing at all, when really it is. The characters are not visibly printed as you type them so keep this in mind.
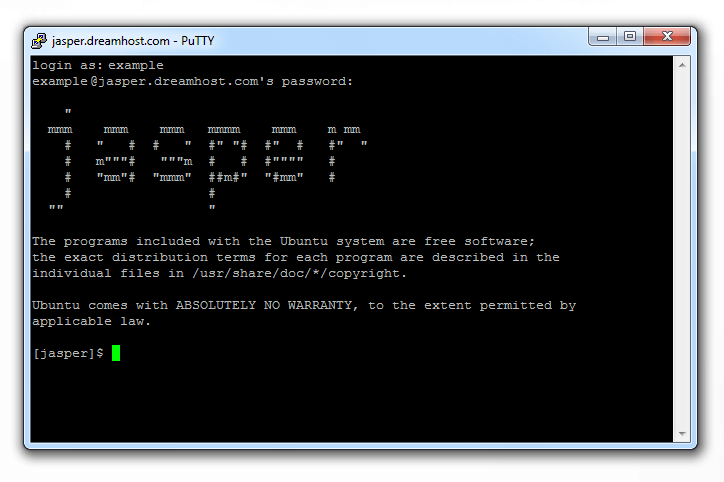
If you mistype the password you’ll see an “access denied” message returned.
Enter the credentials successfully and you’ll be greeted with welcome message:
Error: “Server unexpectedly closed network connection”
If you get this error it could be because you left too much time between entering your username and password. If you leave more than 10 – 15 seconds the software appears to disconnect.
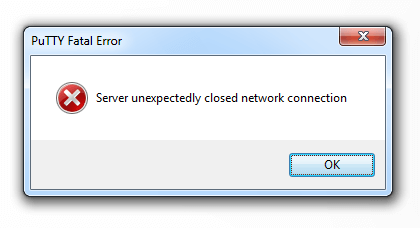
You might also need to ask your webhost to whitelist your IP.
When attempting to SSH, an IP that is not whitelisted could be blocked if you keep connecting or disconnecting from the server in a short amount of time.
Contact your webhost support and ask them to check to see if your IP is blocked. You can whitelist your IP yourself in most cases. There are instructions on how to do this furthur down the page.
If you don’t know your IP, visit whatismyipaddress.com or https://www.expressvpn.com/what-is-my-ip.
Creating SQL Database Backups Via SSH
Now you need your MySQL database name and hostname. You also need the username and password associated with the database.
Do not confuse the database username and database password with the FTP username and FTP password.
The command you’d normally enter will look something like this, all on one line:
mysqldump -u [username] -p[password] -h [hostname] [databasename] > [filename.sql]
Obviously you enter your credentials in place of the examples. This command instructs the server to create an .SQL backup in the root of your public folder.
- Please notice there is no space between
-pand[password]. This is because any spaces here will mean the password will be interpreted as the name of the database for themysqldumpto act upon..
I prefer to execute the command line as below instead, meaning I’ll be prompted for the password on a new line:
mysqldump -u [username] -p -h [hostname] [databasename] > [filename.sql]
Here’s how it looks in the PuTTY terminal:
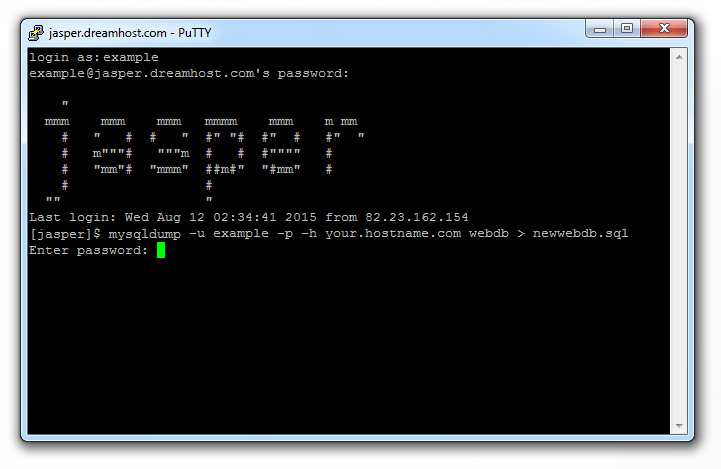
Anyway, assuming your password was correct, you’ll receive absolutely no indication of success. Haha! Seriously, all you’ll see is the following:
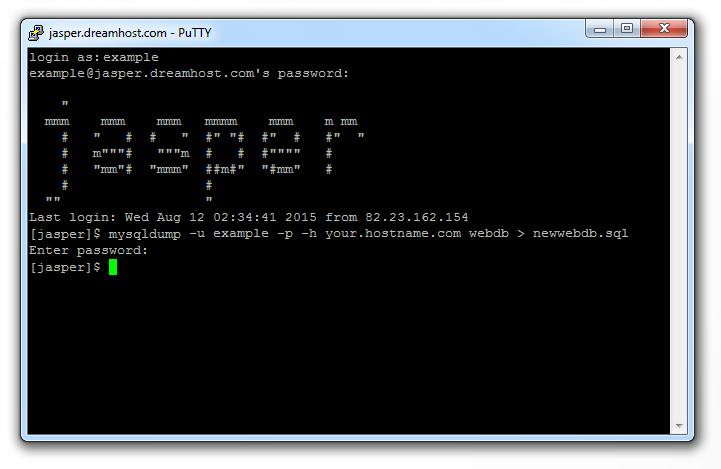
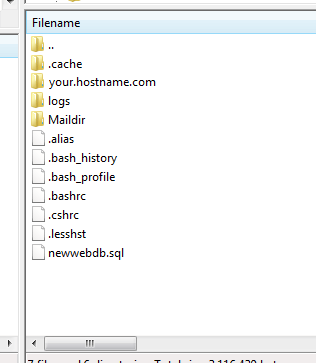
This means the database is being built and saved. By default, the database, which I namednewwebdb.sql is placed in the root directory/folder of the user example. Let me repeat, for emphasis, the .SQL file will be saved to the root directory of the FTP username, NOT the root directory of the website.
At this point I go and make a cup of tea but the time it takes to build depends on the size of your database.
You should FTP into your web server via a client like FileZilla using the username and password you used to access PuTTY at the beginning.
Assuming you didn’t disable FTP access for the user while enabling SSH you’ll be able to get in and see the database SQL file.
Here is what I see in the root user directory:
mysqldump Error 2013
It seems I was getting timeouts which were interrupting the build of my database.
Here’s the error:
mysqldump: Error 2013: Lost connection to MySQL server during query when dumping table `wp_posts` at row: 4407
I called my host and they told me to try the GZip format instead of SQL. Apparently my database was causing timeouts because it had gotten so big.
Zipping Your Database
I tried the following command and I was able to complete my backup without issues. All I had to do was download the file to my machine and unzip it.
mysqldump -u [username] -p -h [hostname] [databasename] | gzip > [filename.sql.gz]
The dump was compressed down to under 10MB and I only needed winrar to unzip it.
mysqldump Error 1044
The database name you enter is case sensitive because we’re dealing with a Linux server. Don’t make the mistake of entering all lowercase characters if the database uses some uppercase characters too.
The error I got was this:
mysqldump: Got error: 1044: Access denied for user 'example'@'jasper.dreamhost.com' to database 'webdb' when selecting the database
The trick here would be to type the database with uppercase. For example WebDB.
mysqldump Error 1045
The first time I tried to make a database dump, I received the following error:
mysqldump: Got error: 1045: Access denied for user 'example'@'jasper.dreamhost.com' (using password: YES) when trying to connect
I found this error extremely annoying and wondered if it was because I kept connecting and reconnecting to the server while running various tests. This kind of activity often raises a red flag for a shared host because spammers or hackers are usually a problem for cheaper hosts.
So I looked into it…
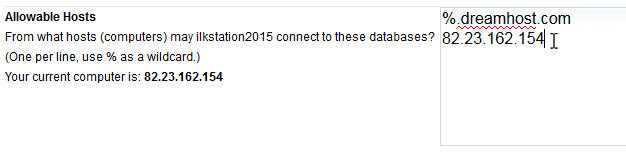
Whitelist Your IP
I decided to check to see if the IP address of the machine I’m trying to make the dump from is whitelisted for the database user in my webhost MySQL control panel.
It was not whitelisted. A possible cause for Error 1045.
My DreamHost user settings for the database detected my IP address automatically so I copied and pasted this into the Allowable Hosts field.
I have a fixed IP but if yours is dynamic (meaning it changes partially because your machine is part of a private network) you might want to use the wildcard setting.
Be warned, using the wildcard setting grants access from anywhere and is considered a security risk. It is generally not recommended unless you’re only doing it temporarily.
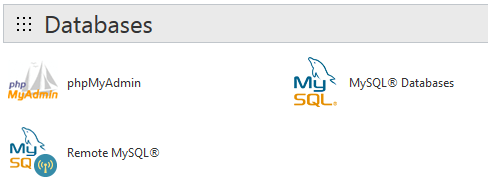
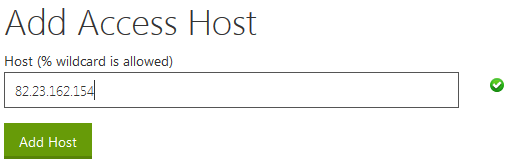
If you’re a cPanel user (which includes GoDaddy) you can whitelist your IP by visiting the Remote MySQL area:
Once you’re in the right place you’ll be presented with an option to add access for a host/IP address:
If your IP address changes, you’ll need to update it. I recently did a router DNS flush when I had some general internet connection trouble and doing so reset my IP address.
Just a heads-up!
Backticks for Passwords Containing Special Characters
Another tip is that if your password contains special characters, like ?!@^, you should end your password within single or double quotemarks like so:
'p@ssword!!'
SSH Commands
Take a look at http://www.sshcommands.co.uk/ for a list of Shell commands.
There’s also http://linuxcommand.org/man_pages/mysqldump1.html
You can also use git bash which will give you a basic bash prompt inside of Windows, from there you would run “ssh username@domain.com” as if you were running a Linux desktop.