WAMP is a free Windows localhost server for website testing and development with Apache, MySQL and PHP – it’s the ideal environment for repairs.
WAMP, also known as WAMPserver is a free localhost server stack comprising Apache, MySQL and PHP for Windows. It is ideal for learning, testing and developing websites without having to use a remote web server.
I use WAMP personally and professionally for my WordPress websites because it allows me to experiment with code, design, plugins and frameworks all within the safety of what you could compare to a sandbox. 🚼
 In my opinion, it is dangerous to do major maintenance tasks on a live website. The larger the website, the more there is to lose. If you don’t like nasty surprises, use a localhost. 🔬
Developing your site in a safe environment means there can be no inconveniences. WordPress websites are particularly vulnerable to attack on a remote server – more so when you’re rebuilding or repairing parts of it live.
WAMP acts kind of like a shipyard or pit stop. 🔧
Build out your site and launch when ready. Clone a copy of your live site and examine it. Share a project with a team of developers. There’s so much you can do and it costs nothing because WAMP is free. 🏅
Why I Like WAMP
WAMP has become my preferred localhost software because it can handle multiple installations of WordPress. Of course, you can install whatever content management system you like, whether it be Drupal, Joomla or Magento. Or you might not want to use any type of CMS at all.
When I started using WordPress a few years ago the localhost I used exclusively was InstantWP because it is free, requires no installation and is “portable”, meaning you can copy it to USB flash drives and run the software directly off the drive.
Instant WP – Free Software to Build & Test WordPress Sites Offline 🏗️

InstantWP is good for smaller websites and handy when meeting clients and demoing a WordPress website because it can be run quickly. (You’ll need to configure the software to use their browser though.)
WAMP has better stability and is more widely supported. If you tend to do all your development on one computer it’s arguably a better choice.
It requires installation from either a 32-bit or 64-bit .exe.
Preparing to Install WAMP
While you can install any CMS you want, I’m going to go with WordPress.
You might not actually want to install a CMS, which is fine. If you have HTML or PHP webpages, these can be used instead.
If you already know that you don’t need to install a MySQL database, ignore the parts of this guide about phpMyAdmin and databases.
Disable any firewalls, at least during installation.
Also make sure you disable Microsoft IIS, and be sure to install all the necessary Microsoft Visual C++ packages, as WAMP may not work at all.
The WAMP website has a page with all the versions of VC++ you might need, plus a handy tool for checking which ones are not yet installed.
1) Download WAMP
Visit http://www.wampserver.com/en/ and scroll to the Downloads section.
You have the option of either a 32-bit download or a 64-bit download.
If you’re unsure what kind of operating system you’re running, you can safely download and install the 32-bit exe on any Windows OS. Use the Windows command msinfo32 to get a quick overview of your system and determine whether you’re on 32 (x86) or 64 (x64).
I’ve recently installed WAMP 3.3.2 as it comes with several iterations of the latest PHP 8 which is needed for the recent WooCommerce software updates.
The WAMP forums might offer the right information.
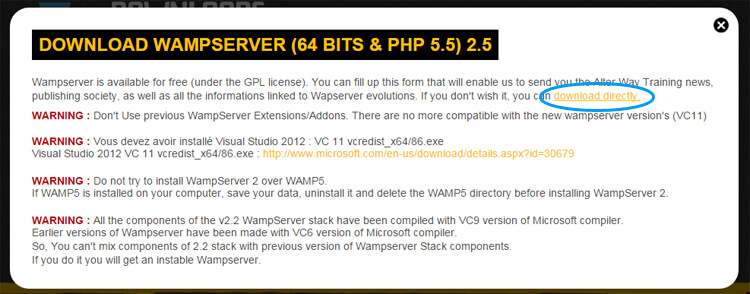
Before you can download your chosen WAMP installation package, a popup like that below will warn you about compatibility with older versions of the software.
WAMP has since been updated so it will be a little different in so much as the version numbers will have changed.
Click the orange “download directly link” and choose a location and save the package when prompted..
2) Install .exe
Double click the setup file. If you experience the warning message (or something similar) in Windows informing you the software lacks a valid security certificate, you can ignore this.
It is safe to run the software.

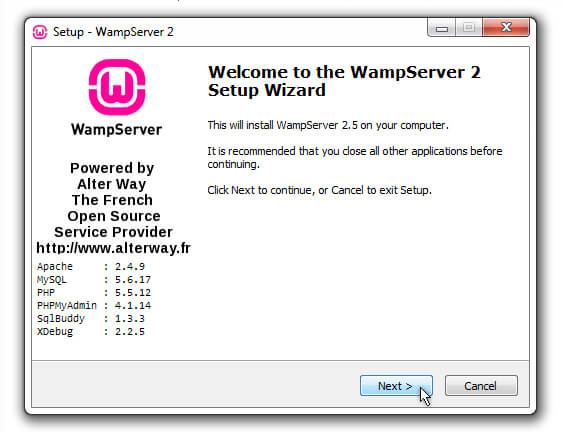
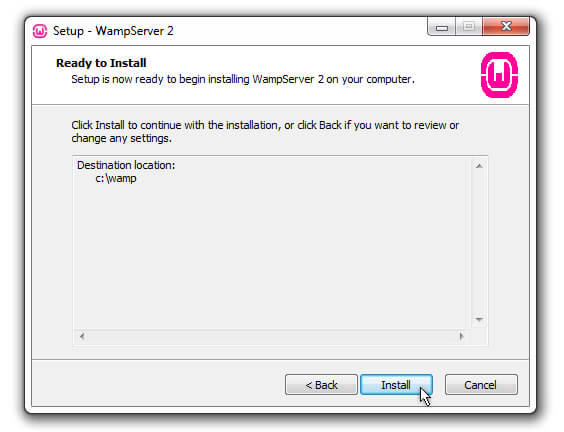
Next you’ll see the setup wizard welcome screen with details on the exact versions of what will be installed as part of WAMP.
Follow the on-screen prompts and decide what location you’ll use for the software. By default it uses C:\wamp\ but you can change this.

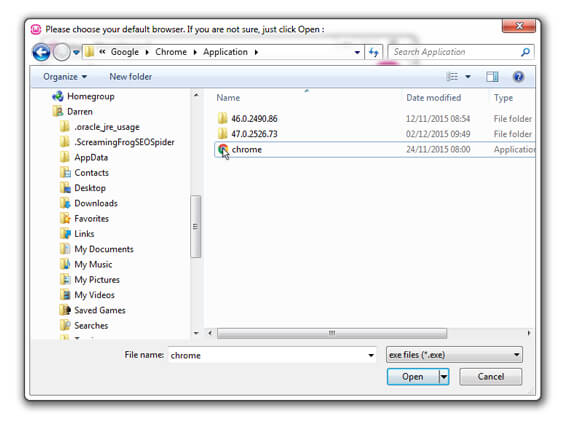
The software will install and then you’ll be prompted to choose what browser to use. By default it suggests Edge.
When prompted, navigate to your preferred browser.
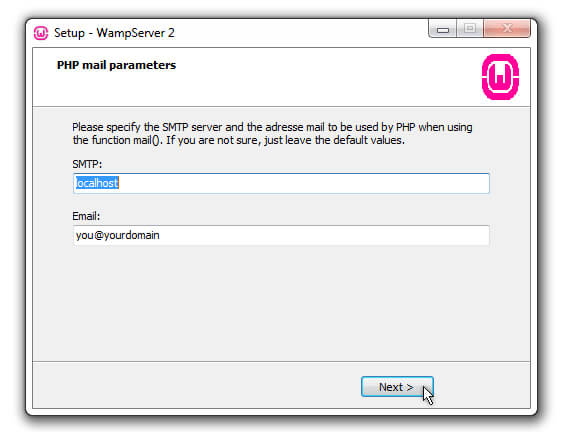
Next, you’ll see a window asking for PHP mail settings. You can leave the defaults settings.
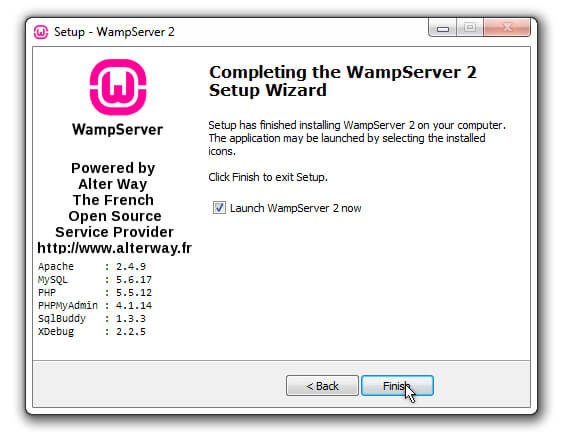
You’ll see a message telling you the setup wizard has completed. Now you can click finish.
Missing File Error During Installation?
If you get a message telling you that vcruntime140.dll is missing, you might need Microsoft Visual C++, so download the latest version of that.
You can the Visual C++ 2015 version here. Uninstall WAMP fully first and restart your PC.
3) Prevent Port 80 Skype Conflict
Before you launch WAMP, I should point out there are conflict issues with Skype.
Skype conflicts with WAMP because they both try to use port 80 by default.
If you are running Skype (the classic 7.41 version), let me share a quick tip that will allow you to run it at the same time as WAMP without any problems.
Open Skype and click Tools > Options > Advanced > Connection
Uncheck the box titled Use port 80 and 443 for additional incoming connections

You might want to restart your computer at this point.
4) Configuring WAMP
You can launch the software by searching for WampServer in the Windows Start Menu.
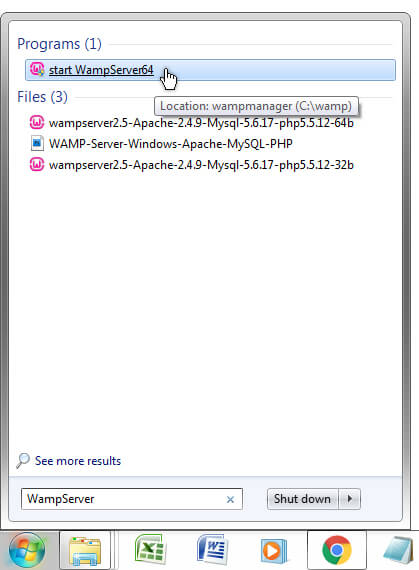
Click the icon and direct your attention to the Windows system tray on the lower far right side of your computer monitor.
You should see a green “W” icon.
![]() If you do not see the icon at all, it might be hidden in the mini flyout menu denoted by the small arrow.
If you do not see the icon at all, it might be hidden in the mini flyout menu denoted by the small arrow.
You can drag and reposition the “W” icon in your system tray.
When you launch the software, the icon should turn green, but often it will not.
Sometimes it will jump straight to green, other times it will slowly change to green through red and amber.

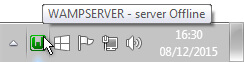
Red is bad, amber is bad, green is good.
Seeing the green icon indicates all services have successfully started and most of the time this will be the case.
But what if your icon is stuck on red or amber?
Red or Amber Icon
A red icon means something is blocking port 80. Try the Skype tip I mentioned. If you’re running a firewall or antivirus software, try disabling it.
An amber icon colour means the Apache services have not started.
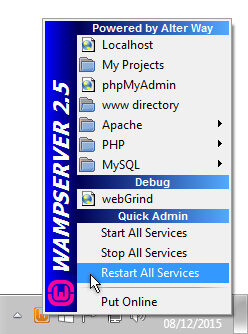
You could try the Restart All Services option. This is the first thing I try when I need to refresh everything.
If this does not work, try Apache > Service > Start/Resume Service
![]()
Still no change?
Here’s another suggestion: change the port number used by WAMP in the httpd.conf file.
Navigate to Apache > Services > httpd.conf
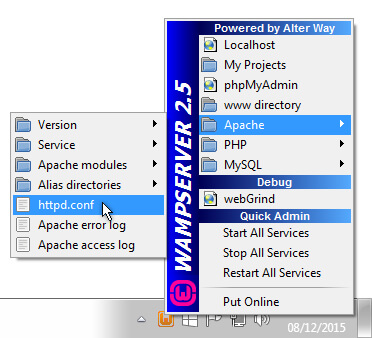
Search httpd.conf using CTRL & F.
Locate the three occurences of :80 and change them to :8080
This is what you’re looking for:
Listen 0.0.0.0:80
Listen [::0]:80
ServerName localhost:80
If you do change the port number in httpd.conf you will have to manually add :8080 to all your urls including localhost/
Your development server homepage will be something like localhost:8080/
Why is WAMP “Offline?”
If you’re using WAMP “out-of-the-box” you will be using it “offline”. Don’t let this confuse you.
This is the default operating mode and is no way indicative of an error.
Setup Permalinks for WordPress
Assuming you want to build a WordPress site, there’s something we need to enable under the Apache settings.
It’s the permalinks settings.
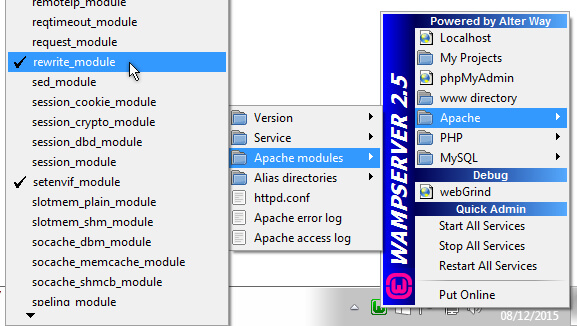
These are controlled by the rewrite_module. Make sure this is checked.
Click the green icon and choose Apache > Apache modules > rewrite_module
By default this is sometimes unchecked, so always check this option in any new installation of WAMP.
At this point the green “W” icon in your system tray will turn amber then back to green while the Apache services reboot. This can sometimes take several minutes.
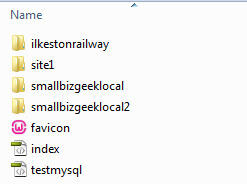
www Directory
The www directory is installed to C:\wamp\www\ by default. You can access this quickly via the WAMP menu in the system tray.
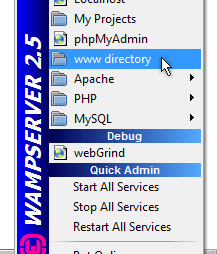
Create a new folder in the www directory and call it anything you want.
For the purposes of this guide I’m calling the new folder “test”.
5) Accessing localhost
The URL localhost/ is the address of your offline testing environment. When your site is uploaded to your host you change all occurrences localhost/ to your domain name.
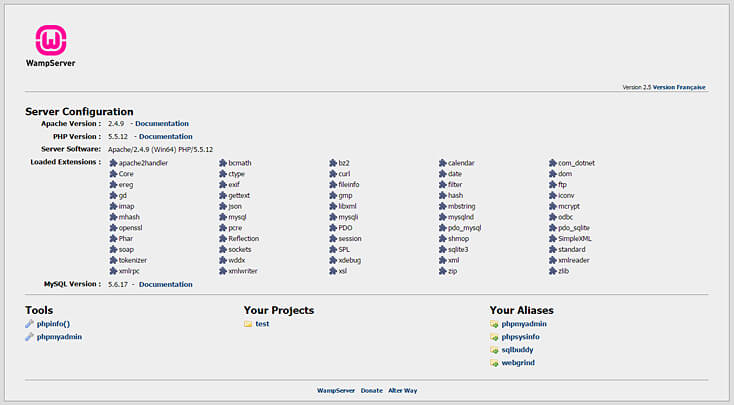
To open up the localhost homepage, click the green “W” icon in your system tray and choose Localhost.

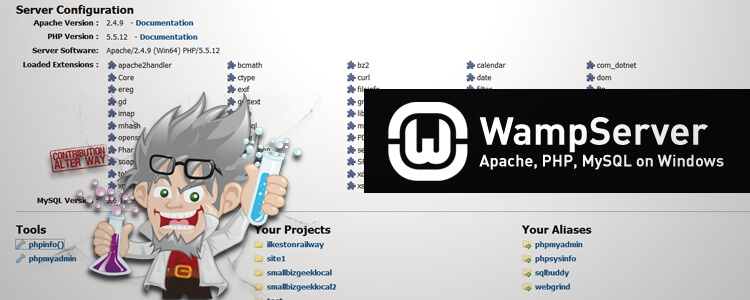
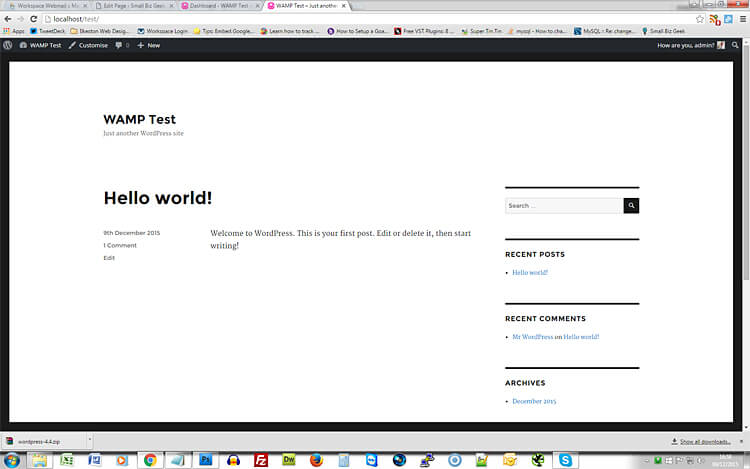
You will be presented with the localhost homepage in a new browser window.
It looks something like the following screenshot. Notice the “test” folder has appeared here, under Your Projects:
6) Installing WordPress
Because we’re going to download and install the latest version of WordPress, we first need to set up a new MySQL database.
WAMP comes with phpMyAdmin (a database management tool with a graphic user interface). This particular tool is not everyone’s cup of tea when it comes to databases, but it IS pretty common.
Setup Database for WordPress
Let’s get started by creating the database inside WAMP using phpMyAdmin.
Visit localhost and click the blue phpMyAdmin link. Alternatively, use the menu from the system tray icon to access phpMyAdmin.
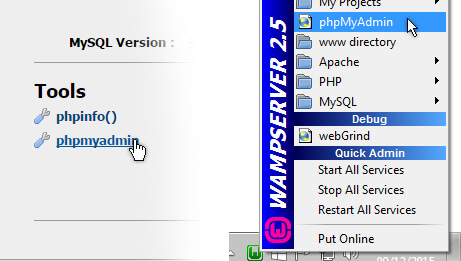
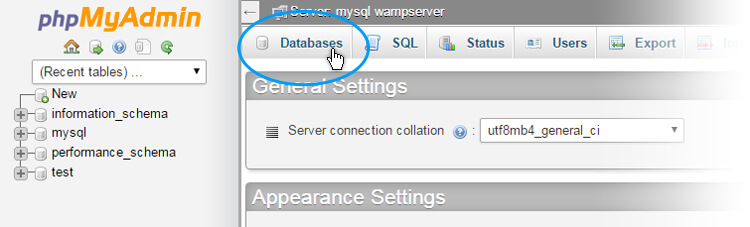
The phpMyAdmin interface will open. Click the Databases tab.
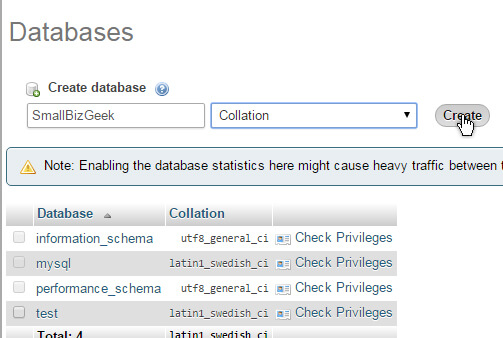
Now create a database, giving it a name of your choosing. You can call it anything you want.
If you use uppercase characters, they’ll automatically be come lowercase when the database is created.
Download & Configure WordPress Package
Download the latest version of WordPress from WordPress.org.
Once you’ve downloaded it, unzip the archive and copy all files to C:\wamp\www\test\
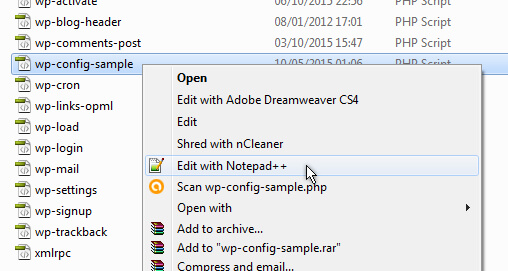
Next, open C:\wamp\www\test\wp-config-sample.php
Use WordPad (comes with Windows) or Notepad++ (free, open source, excellent).
Locate the following lines:
// ** MySQL settings - You can get this info from your web host ** //
/** The name of the database for WordPress */
define('DB_NAME', 'database_name_here');
/** MySQL database username */
define('DB_USER', 'username_here');
/** MySQL database password */
define('DB_PASSWORD', 'password_here');
/** MySQL hostname */
define('DB_HOST', 'localhost');
Change the the database name and the database username as shown below:
// ** MySQL settings - You can get this info from your web host ** //
/** The name of the database for WordPress */
define('DB_NAME', 'smallbizgeek');
/** MySQL database username */
define('DB_USER', 'root');
/** MySQL database password */
define('DB_PASSWORD', '');
/** MySQL hostname */
define('DB_HOST', 'localhost');
FYI – with any new 'localhost', the username is always 'root' and the password is blank, indicated by the '' characters.
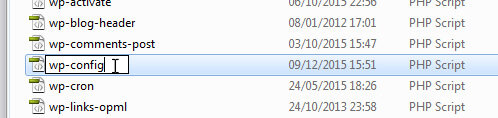
Save the changes to wp-config-sample.php and close. Rename it to wp-config.php
Now open localhost/test/wp-admin/install.php or just visit localhost/test/
You’ll be presented with the WordPress installation screen. Add a site title. Enter a strong username and strong password.
Make a note of these credentials and keep them safe.

You are now done. Check the front page to see everything is working.
If you get a database error screen, it’s most likely that you’ve mistyped the name of your database in wp-config.php
Clear the browser cache or view incognito if you’re getting errors. If you still get errors, try and flush the permalinks cache in the WordPress dashboard.
To login to your WordPress dashboard, type localhost/test/wp-admin/
When you eventually move your website online (which I’ll talk about another time) http://localhost/test/ will be swapped out for http://www.yoururl.com/
Backing Up WAMP
One thing that is useful to know is how to backup your WAMP server.
You can, of course, log into the localhost phpMyAdmin and export your databases as .SQL files. (By the way, are you getting logged out of phpMyAdmin? Here’s how to hard code the username so you never have to go through the login screen when the session expires.)
You want to regularly make copies of the all-important www directory as well as the MySQL folder containing the databases.
I say this because I recently had to reformat another machine that had WAMP installed. Before wiping everything I copied the entire C:\wamp\ folder to my external USB drive.
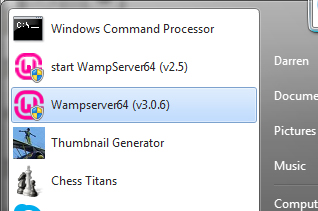
Upgrading WAMP to a Later Version
It’s possible to upgrade the software to a later version. Rather than do that, I installed the newest version separately and in its own folder.
There are now two shortcuts pinned to my Windows Start Menu.
I copied the contents of the www folder (the directory files) and the entire data folder (the database files) into the corresponding locations in the newer installations.
This is the safest way to run it as far as I am concerned. There are/were some discussions on the WAMP forums about installing the latest version.
Change URLs without Breaking Serialised Data
Once you start cloning and migrating sites that use a MySQL database, you’ll need to know how to change all instances of URLs in the database.
The following examples are common:
- You need to change localhost/test/ to localhost/testing/
- You upload to a remote server and need to change localhost/test/ to yourwebsite.com/
- You clone a site on a remote server and must change yourwebsite.com/ to localhost/test/
If you know how to use SQL queries, you can go into phpMyAdmin and run some manual commands that replace all URLs.
WP Migrate DB
I use this WP migration plugin a lot to push/pull databases between local and remote servers. very handy. Had some issues with utf8mb4 emojis being wiped out when I brought a remote database into WAMP, but that might be solvable via wp-congfig.php.
If you have the same issue and can’t solve it, try the solution below, which is a free PHP script.
Search Replace DB Master
This is another tool that won’t break the serialised data (aka the hardcoded data about length of a URL inside an SQL file) and it’s also free.
It’s called Search Replace DB Master. It is placed in the root directory of your WordPress installation, either on a local or remote host.
You load it in your browser and search your database for all instances of a particular URL to change it to a new one.
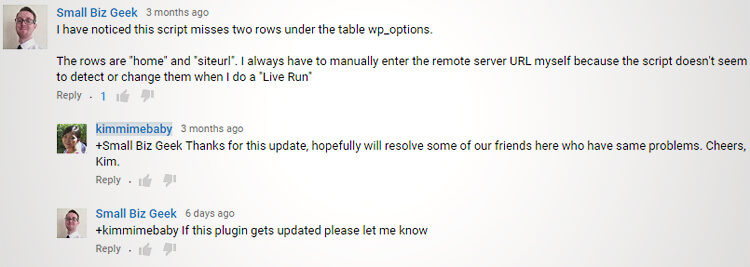
The video does not mention the fact that you need to manually change the two rows under wp_options.
If you look in the comments, you’ll see I made a comment about this:
Summary: An Invaluable Web Tool
It’s free, it’s powerful and it’s not just for WordPress. WAMP is going to be my localhost of choice for a long time. ⚓
The benefits for me are peace of mind. Knowing what I can do in terms of development and testing gives much confidence and plenty more options.