Free commonly-used and very customisable plugin used in millions of WordPress.org installations for order forms, contact forms and more.
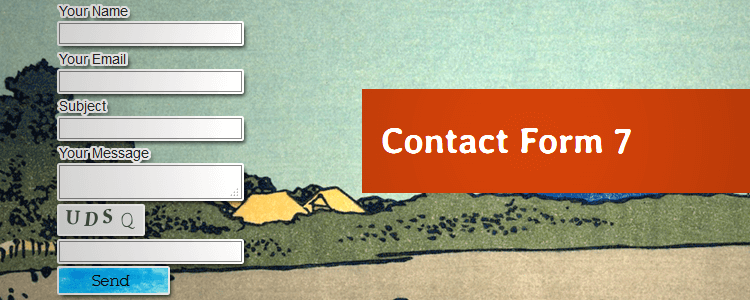
For me, one of the perks of using WordPress is that I don’t have to manually code email contact forms like I have had to with static HTML sites. Contact Form 7 is the go-to contact form plugin for most WordPress users even though the newer full site editing experience (FSE) and blocked-based themes is rendering this plugin less needed.
It’s a free solution, easy to install and reasonably simple to style with CSS. It needs to be configured by following some instructions available on the Contact Form 7 website otherwise you’ll experience validation and sending errors.
Known Issues
Because of some of the problems the plugin presents, novice users end up purchasing a premium plugins or using free alternatives yet still encounter difficulties.
I’ve read lots of troubleshooting forums about email send failure and I hear things like “Just get Jetpack, Contact Form 7 is garbage”, or “Gravity Forms solved everything for me.”
I’ve figured out what causes most of the email send/delivery issues and it’s usually because of spam policy of a shared host where PHP mail (as opposed to SMTP) is being used.
Installation
Search for it in the WordPress repository by navigating to Plugins > Add New and searching for “Contact Form 7”.
The other way to install it is to download the zip file from the CF7 plugin directory page and then upload to your WordPress site through the Plugin dashboard or with FTP software like FileZilla.
Add New Contact Form
Once you’ve installed CF7, a box called Contact will be added to the WordPress dashboard. Click Add New to begin creating a new form.
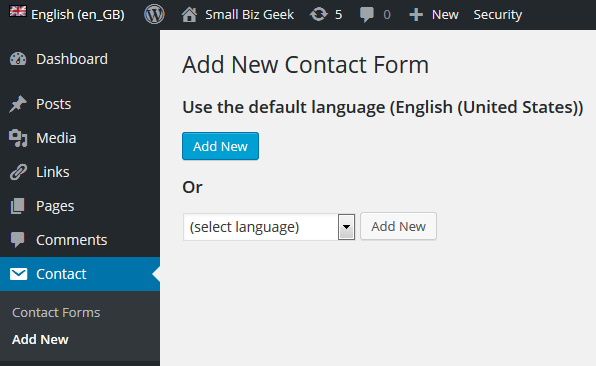
You can probably use most of the default settings of the basic form if you want something for basic email submission. The title of the new form will be Contact form 1.
Editing a New Contact Form
Hover your cursor over the form title and the links Edit and Duplicate will appear.
When you click Edit you’re taken to a configuration page with form settings including the email headers and email body content.
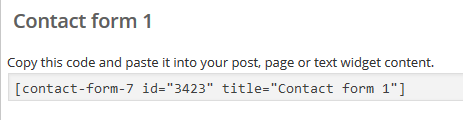
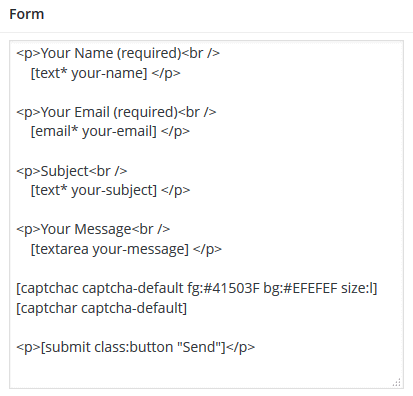
Contact Form Shortcode
One of the first things you’ll see under the Edit settings is the WordPress shortcode for the contact form.
The shortcode is self-contained shortcut to all the code that produces the form. You don’t deal with all the messy, extensive code – just the shortcode.
This is copied and pasted into a page, post or widget, and the form will show on the public front end of the site.
Contact Form Field Settings
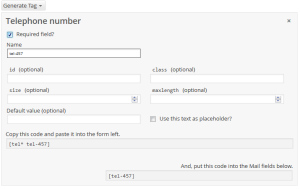
In order to add the fields you want to show up in your form on the webpage, you’ll need to add a series of bits of code to the form.
Required Fields
Notice also in the shortcode examples, any fields that are “required” use an asterisk* symbol after the word text.
[text* your-name]
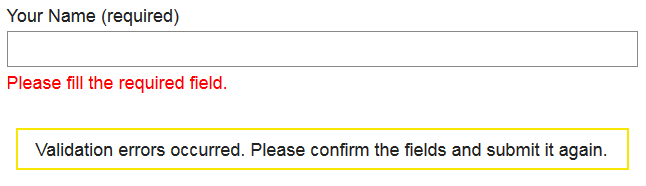
If the website user fails to provide information for required fields, they will receive an error message asking them to go back and fill out the field.
Adding Custom CSS Classes to Fields
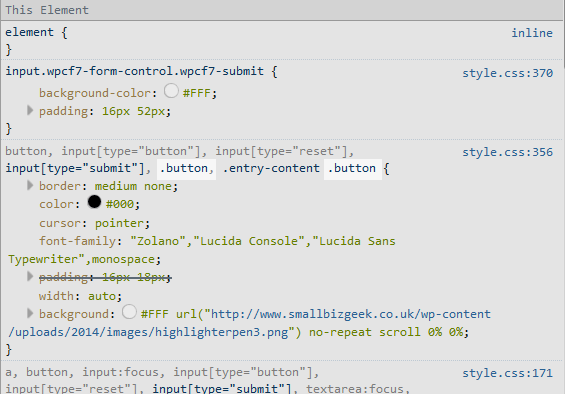
As you can also see in the screenshot, I added a class called button to the “Send” shortcode field at the bottom of the form.
That helps me to style the CSS if I want to jazz up the form.
Generating More Fields
You create more fields using the “Generate Tag” drop down found to the right side of the contact form field area.
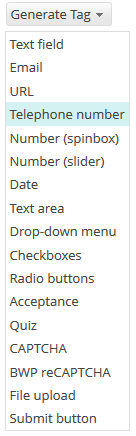
It’s also possible to add advanced functionality like file uploads. A user can upload file types set up by you, which are attached to the footer of the emails.
Customising How Emails Are Sent and Received
You now need to decide where the emails send to and what they will look like when they arrive in your inbox.
This is the part of the configuration that can be a little contentious, since many users assume they only need to enter the email address they want to receive messages at, click save, and wait for someone to send something.
It’s best to set up SMTP sending rather than PHP sending, since the latter often fails if a user is falsely flagged as trying to send spam.
Set Up Mail Headers
You can choose what email to send to, what the subject line should be and how to display the recipient.
All these values should correspond to the individual form fields codes mentioned earlier:

Additional headers
In this section you can add instructions to pass copies of the email to another person, or to send a copy of the email to sender’s own inbox.
It’s also needed to ensure you can press the reply button once you’re received and read the email inside your email provider software.
The Reply-To: [your-name] [your-email] helps me do that.
Emails Not Being Received?
So, the problem/warning I’ve mentioned throughout is addressed in this section.
I use a nifty plugin called WP SMTP Mail because it has cleared up what I regard as a serious problem for anyone using CF7, especially if they’re on shared hosting and have combined different providers for web hosting and email.
Let me explain…
I use DreamHost for the web hosting and GoDaddy for URLS/email.
This means I’ve changed my nameservers over at GoDaddy to send the DNS panel over to DreamHost. This also means I had to add MX records to my DreamHost dashboard in the domain settings if I want to receive mail.
There have been some conflicts because by default, CF7 always tries to send email as PHP mail. This is trusted less and unlikely to make it through to your inbox especially if you’re combining different services as I have done.
DreamHost have a policy about what is known as spoofing where a sender is not authenticated because they’re not sending from an actual mail server: they’re sending PHP mail… a letter without a stamp.
Contact Form 7 ended up being a communications bottleneck in my business operations on account of mail going missing in cyberspace.
Like I said, I’ve written about the WP SMTP Mail plugin so please go read that. I’ve set the link to open in a new window so you don’t lose your place on this page.
Trust me, it’s a safe bet and if you ARE planning to get Contact Form 7 up and running on a website you really shouldn’t be using the latter by itself. Get the other plugin too.
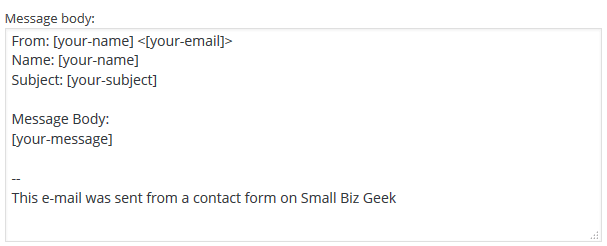
Email Message Body
When you receive an email, it’s a good idea to have CF7 display all the sender’s information besides their actual message all within the body of the email.
Sure, you can see all that info in the headers of the email message but having it display all in one area is useful if you’re printing or forwarding the message.
To do that it’s a case of reiterating those shortcodes from the contact form. Here’s what my message body looks like:
Customise Messages
Finally, you can customise the messages returned to users. These include the success and failure notifications presented after a sender presses the submit button.
By default they are programmed thus:

You can change the language/wording of these message a little if you think it’ll come over better to the website user. Sometime I personalise these messages a little to make them more relevant to the subject of the website.
Keep them short.
Summary: My Go-To Contact Form Plugin
It can be heavily customised and styled. You could create a questionnaire or a survey or a series of product/service order forms using Contact Form 7.
Do check out the official CF7 FAQ and consider going through the step-by-step documentation.
Add Your Thoughts